CDs and DVDs are a thing of the past. Bootable USB drives are now used to reinstall operating systems, and they also let you run an OS from a portable storage device. Let’s take a detailed look at the process of creating a Linux bootable USB drive (using Ubuntu as an example) with Rufus in a Windows 10 environment. We’ll show you how to install a Linux distribution that’s popular among beginners alongside Windows 10.
What Rufus can do
Rufus is a free portable utility for creating bootable USB drives and external hard drives. It supports creating logical volumes on a flash drive and changing their labels. It can scan the drive for bad blocks, perform a low-level format (fixing logical errors) or a quick format. It adapts the bootable USB drive to work with both older BIOS computers and newer UEFI systems.
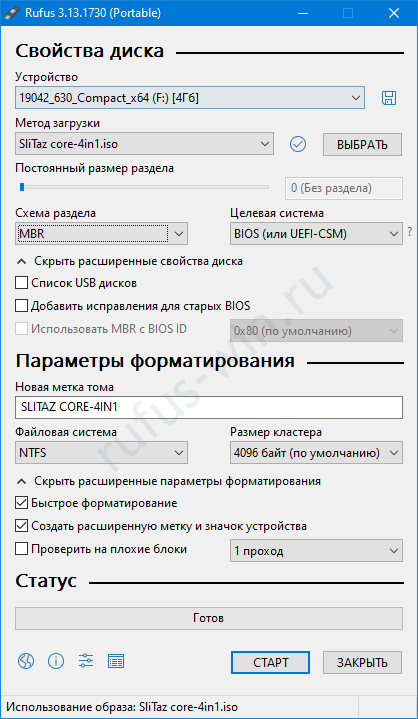
Creating a Linux bootable USB drive: a guide
Linux is a family of free, open-source operating systems. It stands out for the variety of builds tailored to specific purposes: home use, development, education, and entertainment.
A Linux bootable USB drive is used for:
- Installing a UNIX-based operating system;
- Diagnosing and servicing hardware: testing memory, checking HDDs.
- Working with drive partitions: splitting, merging, converting.
- Backing up and restoring data or entire volumes.
- Booting a portable OS that can run from a portable drive on any laptop, computer, or netbook.
Linux distributions supported by Rufus
- Mint;
- Hive OS;
- Arch Linux;
- Archbang;
- BartPE;
- CentOS;
- Damn Small Linux;
- Debian;
- Fedora;
- FreeDOS;
- FreeNAS;
- Gentoo;
- GParted;
- gNewSense;
- Knoppix;
- KolibriOS;
- Kubuntu;
- Manjaro;
- Parted Magic;
- Raspbian;
- ReactOS;
- Red Hat;
- REFInd;
- Slackware;
- Super Grub2 Disk;
- Tails;
- Trinity Rescue Kit;
- Ubuntu.
Determining your PC’s configuration
To write the image correctly, you need to know your PC’s configuration (using Windows 10 as an example):
- Open the properties of the “This PC” folder.
- Check your processor’s architecture.
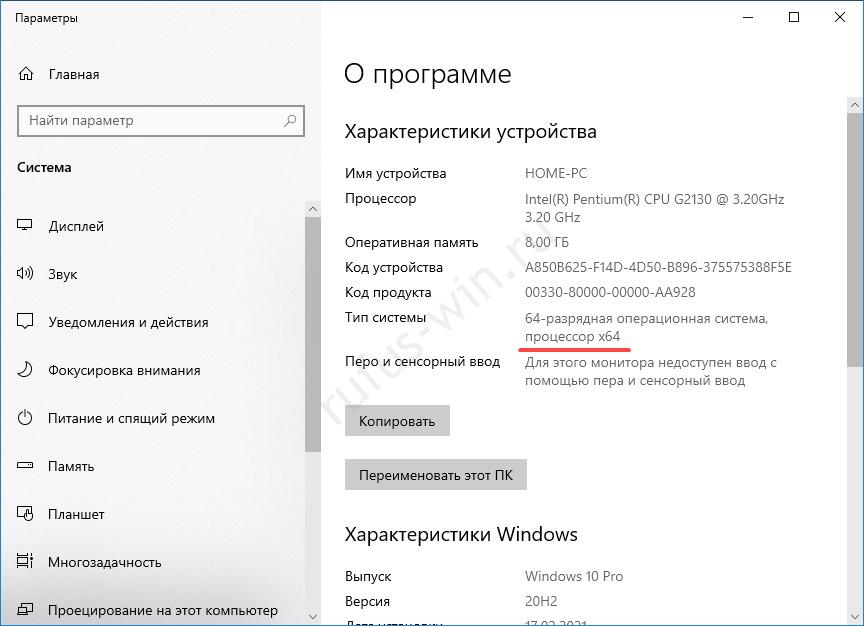
The CPU type is shown in the “System type” line. - Right-click the Start button and select “Disk Management.”
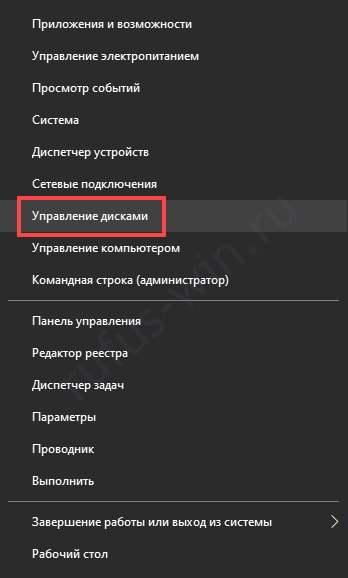
Disk Management. - Open the properties of the drive (on the left), not the logical partition.
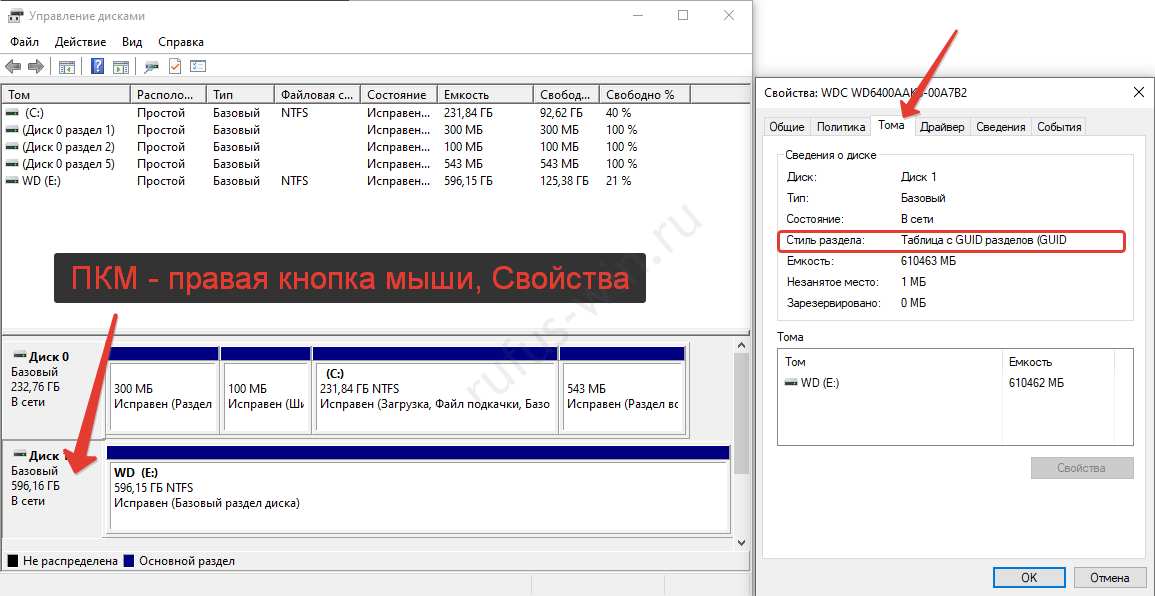
Go to the disk’s properties and open the Volumes tab. - Remember or write down the “Partition style.” You’ll need this information later.
How to download a Linux image for a bootable USB drive
You probably already know where to download the Linux distribution you need, but here are the reasons people choose Linux in the first place:
- Free distribution.
- Customizability — everything can be changed.
- Easy installation.
- Low hardware requirements — it will run on a computer with 256–512 MB of RAM.
- Security — infecting it with a virus takes real effort.
- Fast app installation from the store.
- A wide range of shells or graphical environments.
- An advanced file system.
- A well-thought-out method for storing settings.
- Privacy — it doesn’t collect or share information with the developer.
- Free applications.
Writing an Ubuntu image to a bootable USB drive
It’s recommended to download the Linux distribution you like from its official website, since they’re all free. Let’s go through the process of writing Ubuntu to a USB drive with Rufus.
If you choose a different distribution or an older version of Ubuntu, pay attention to the processor architecture we checked earlier and the architecture of the image you’re downloading. They must match (x32 is the same as x86).
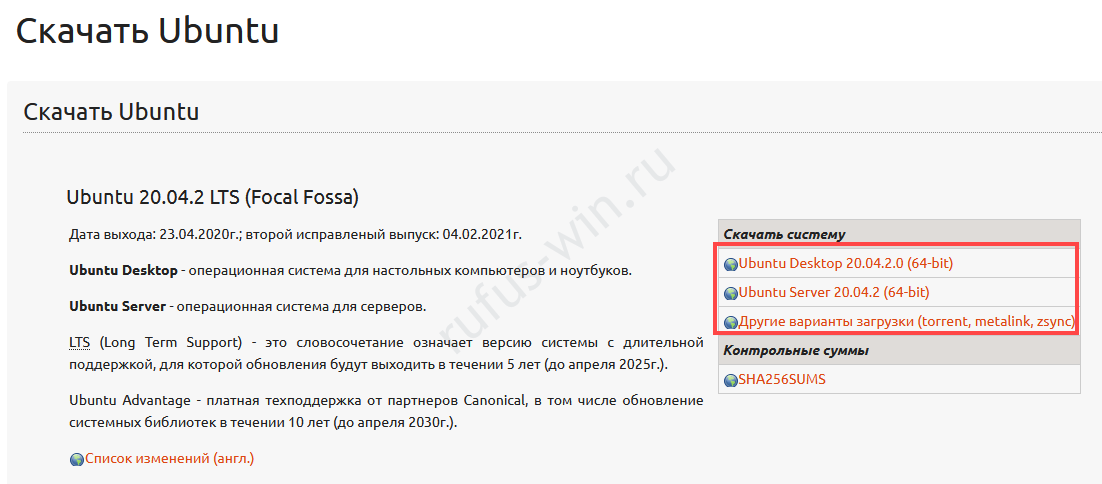
To create the bootable USB drive:
- Download the ISO from the page.
- Copy all files off the drive (they will be erased).
- Launch Rufus.
- Select the target drive from the drop-down list if multiple devices are connected to the PC.
- Click “Select.”
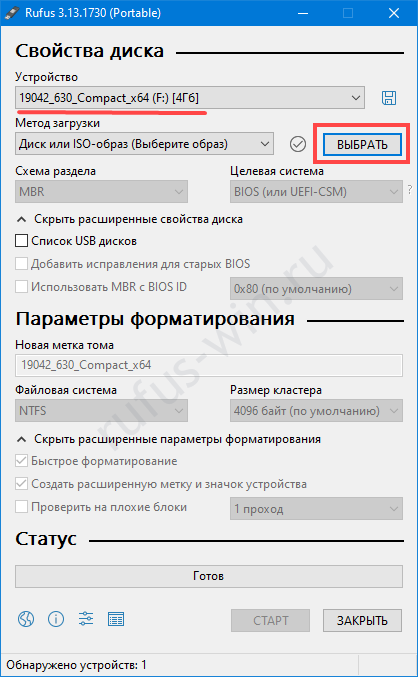
Selecting the flash drive. - Choose the image and open the ISO in Rufus.
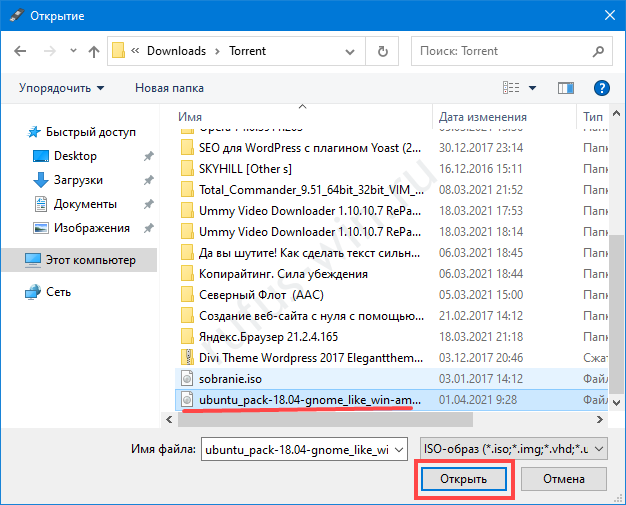
Select the Linux image. - Choose the partition scheme that matches the one your drive uses: MBR or GPT.
- Optionally, you can:
- change the drive’s label;
- split it into a couple of partitions;
- perform a full format of the drive if you’ve had problems with file integrity;
- scan for bad sectors.
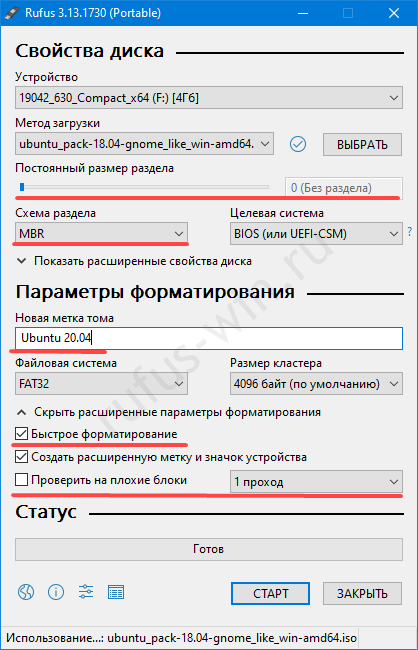
Configuring the installation options.
- Click “Start.”
- When the dialog appears, choose the first option: “Write in ISO Image mode…”
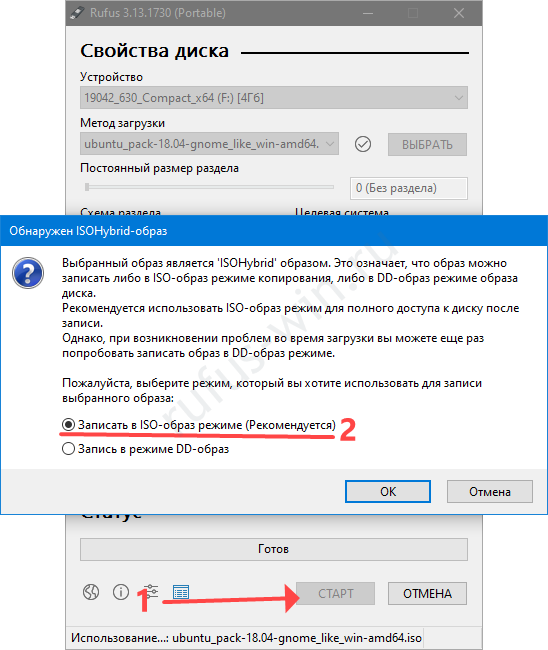
Starting to write the image. - Agree to download the missing components.
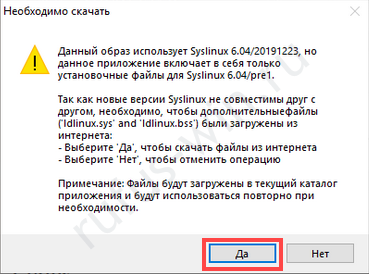
- Confirm that you want to format the device.
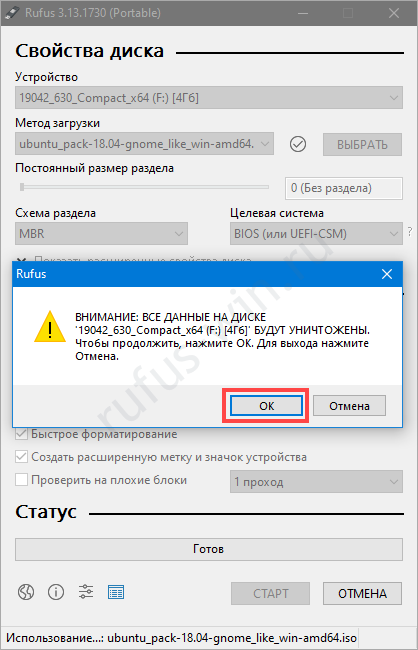
Formatting the drive. - Wait for the files to finish copying to the drive.
Installing Linux (Ubuntu) on a PC from a bootable USB drive
When installing Ubuntu or another Linux distribution on a hard drive that already has Windows, it’s recommended to back up your data. Not because the installer might damage something — more often than not, inexperienced users lose data through their own mistakes. The process takes about 15–20 minutes depending on the power and condition of your hardware.
Preparing the BIOS to boot from the USB drive
To install Ubuntu from the bootable USB drive, restart your computer and open the Boot menu. This is usually done with the F11 or F12 key (check your laptop or motherboard manual for details). Press it when the splash screen appears prompting you to enter the BIOS or UEFI settings.
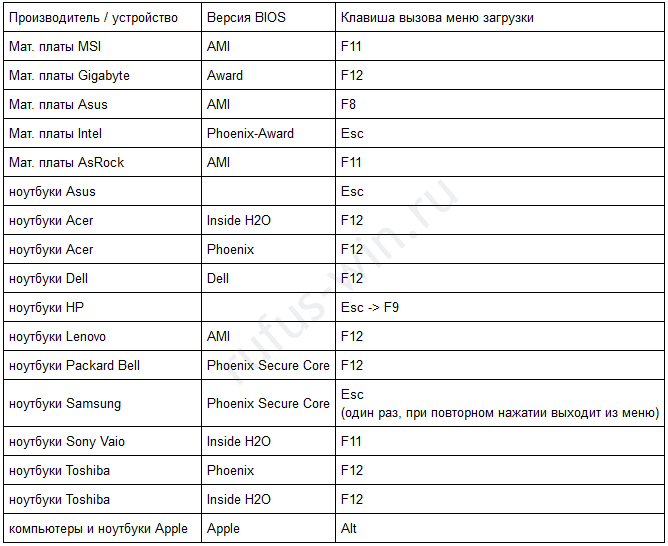
Select the removable drive:
- if you have BIOS and MBR — the option with the flash drive’s name;
- for UEFI and GPT — the entry with “UEFI:” before its name.
Installation
- Choose the interface language.
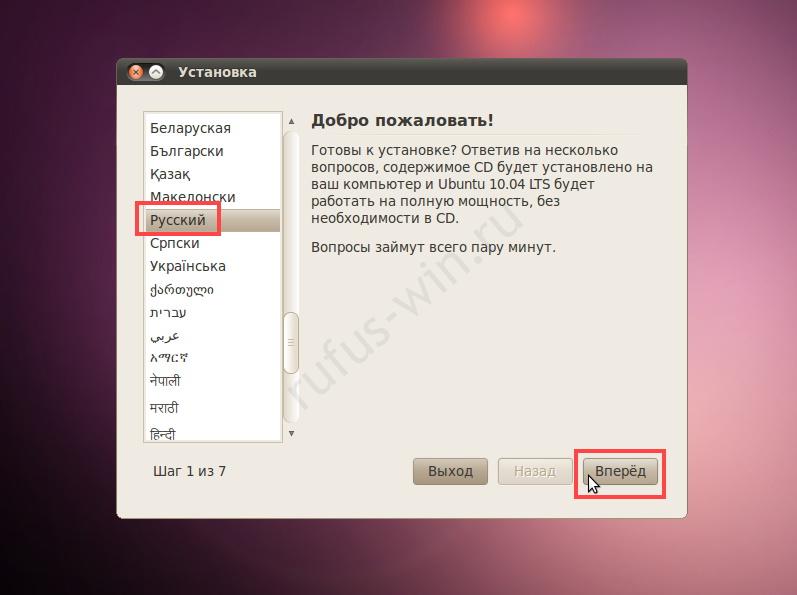
Selecting the language. - The time zone.
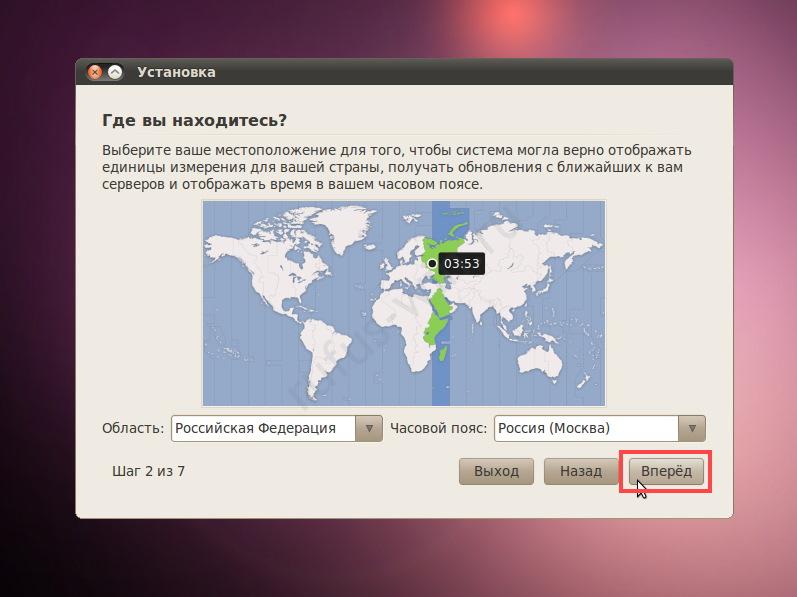
Selecting the time zone. - The keyboard layout.
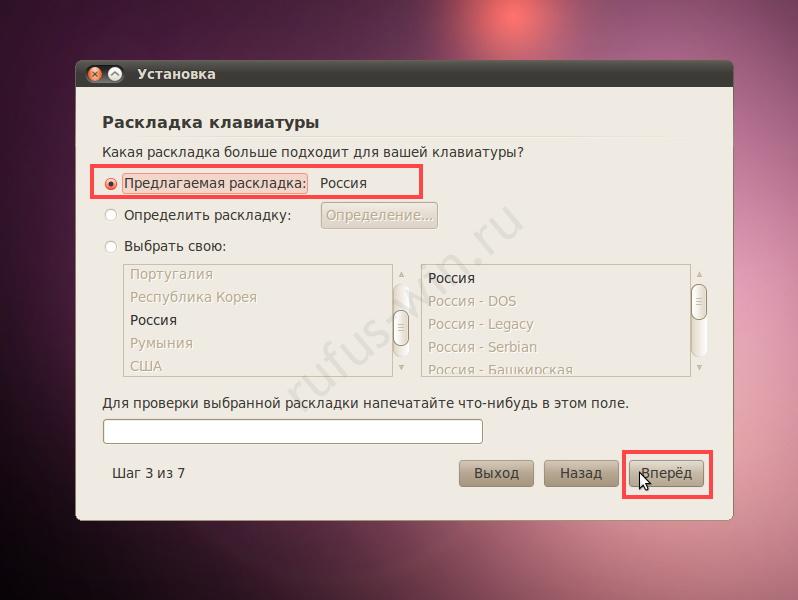
Selecting the keyboard layout. - Move the slider to “Something else” (set up partitions manually).
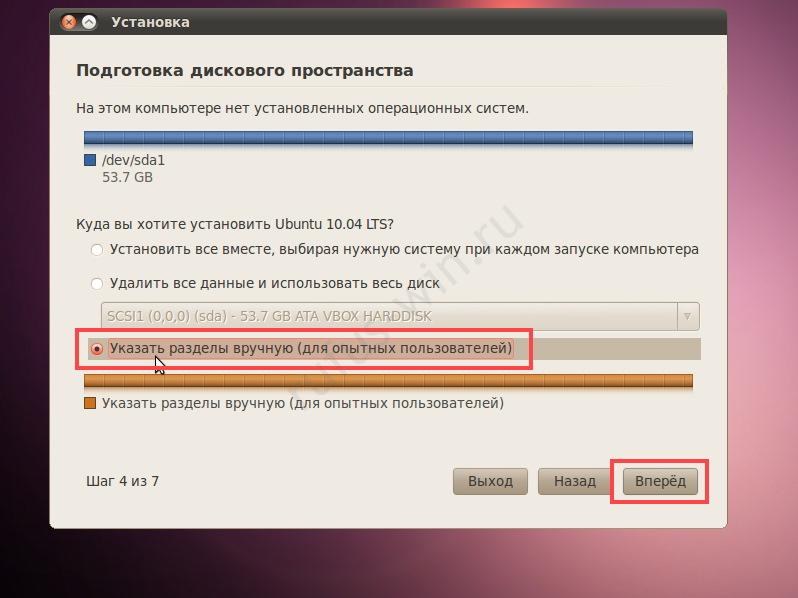
From here, the instructions branch off. In our case, Ubuntu is being installed alongside Windows.
- Select the partition and click “Change.”
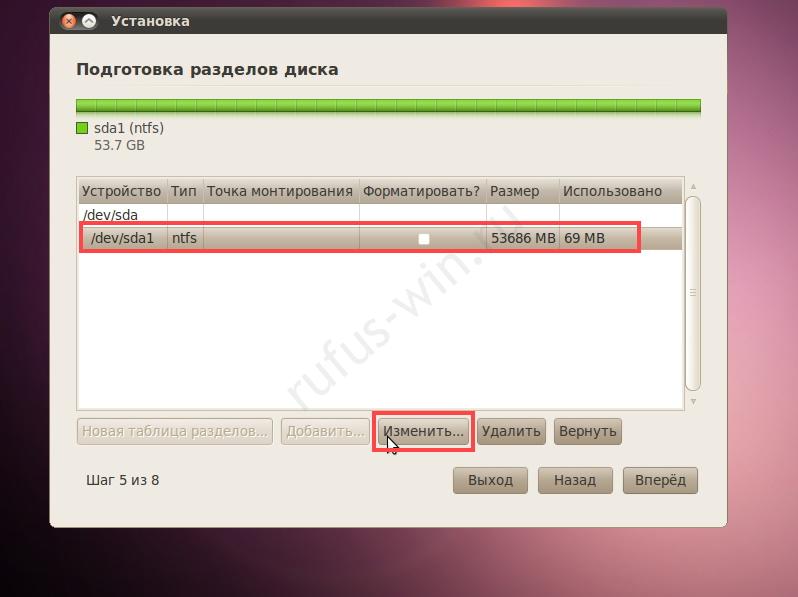
Pointing the installer to the partition. - Shrink the Windows volume (it should have 15–20 GB of free space for Linux + 5–10 GB for Windows to run properly).
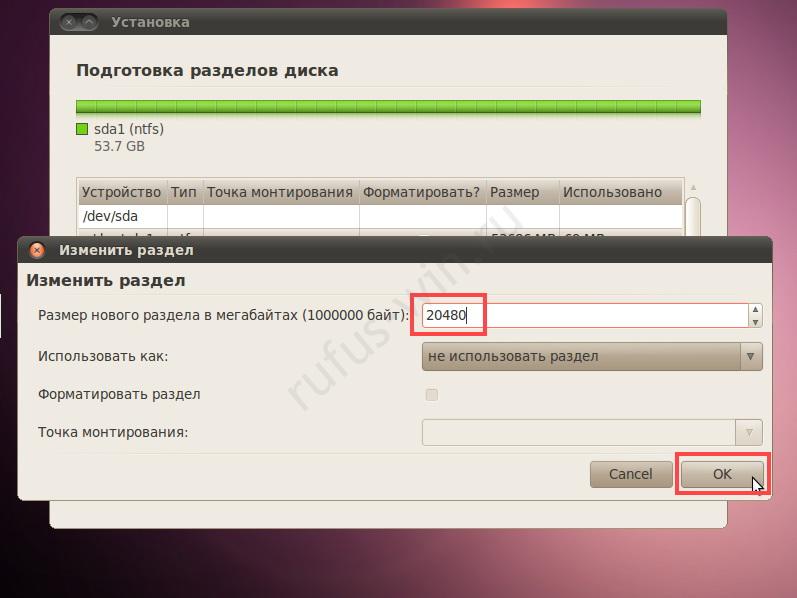
Configuring how disk space is used. - Confirm the operation (it’s irreversible).
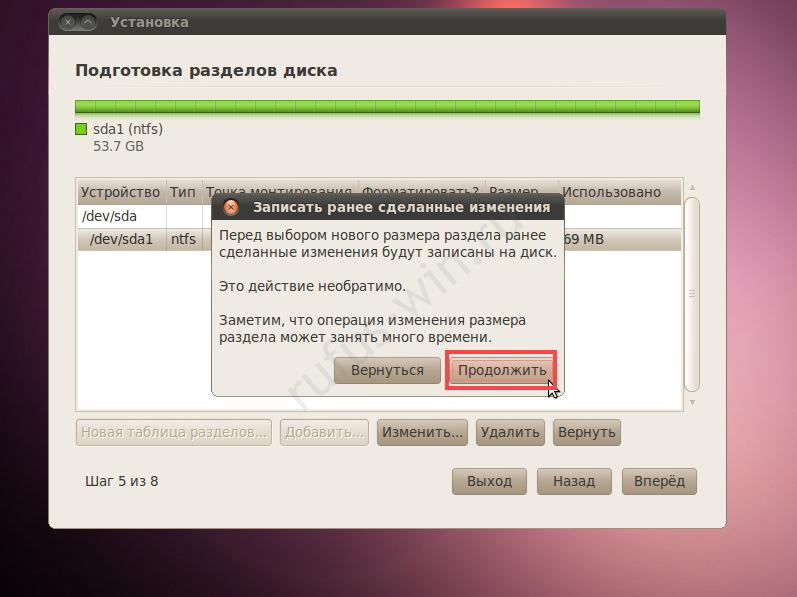
This may take a while, especially if the files on the disk are fragmented. - After creating the partitions, click “Continue.”
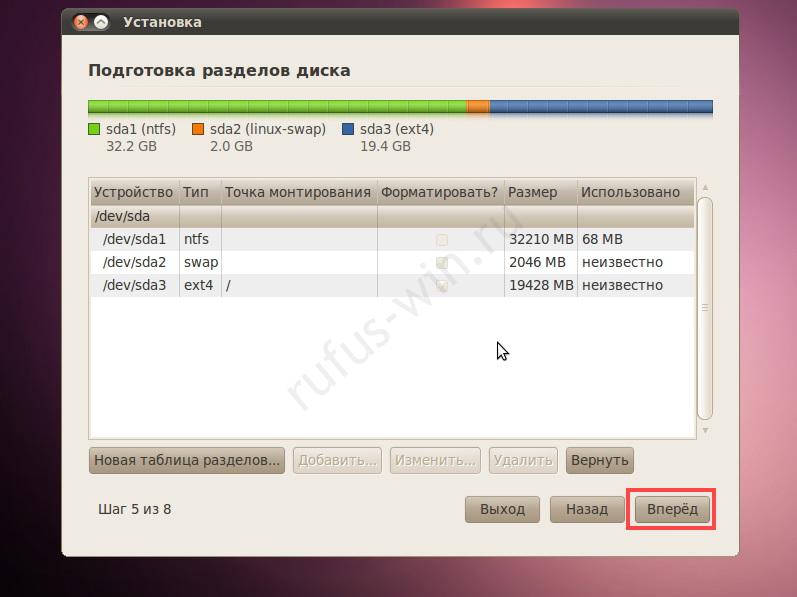
- Set up your account settings: name, password, computer name, and login method.
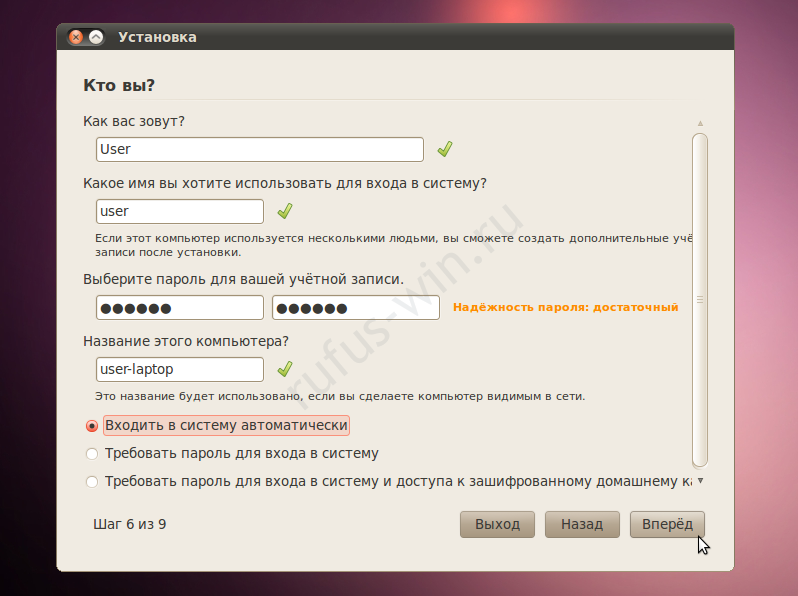
- Agree to the option to import your settings from Windows into Ubuntu.
When installing on a new laptop, computer, or drive, this previous step won’t appear.
- Check the settings and click “Install.”
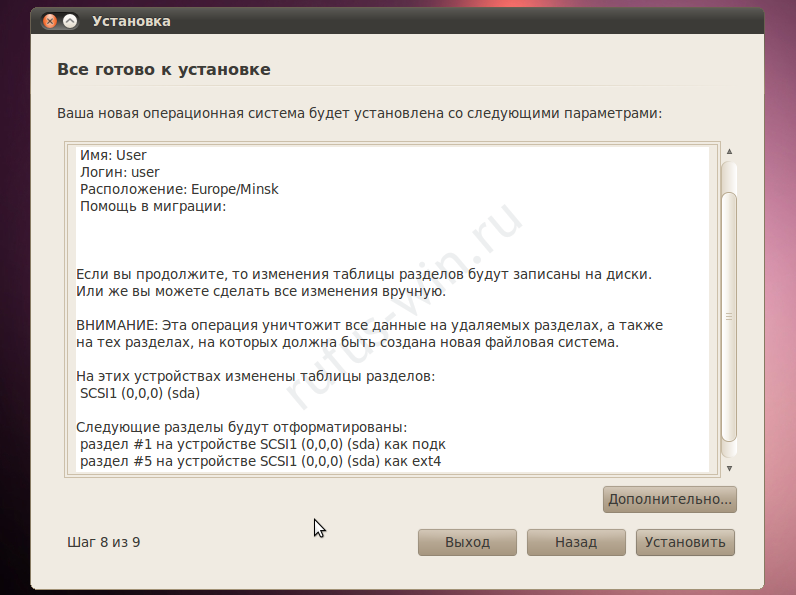
The “Back” button lets you change the settings. - Click “Advanced” to manage the bootloader. Make sure it will be written to the correct HDD or SSD if your computer has multiple drives.
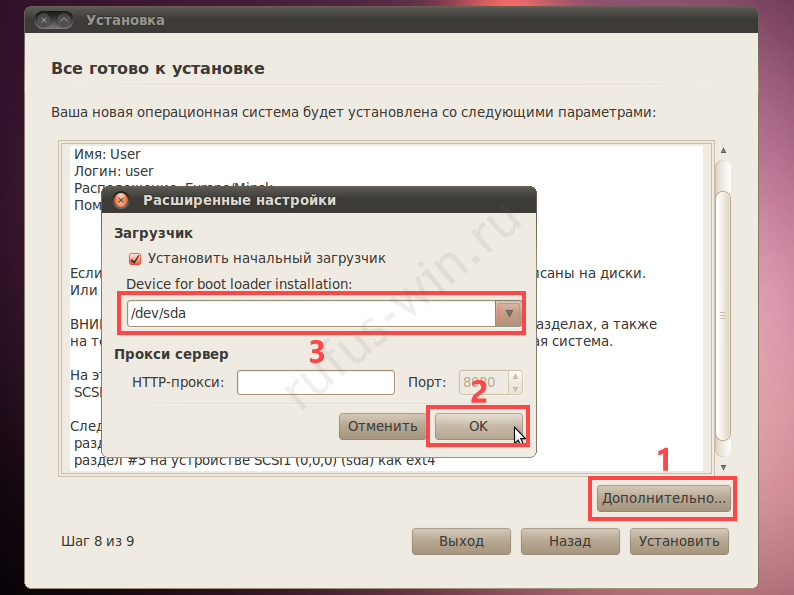
This step is optional. - Once the files finish copying, restart your computer.
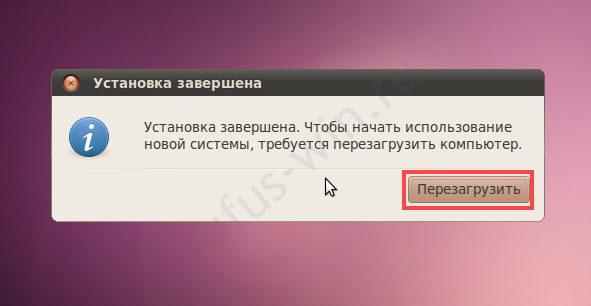
Restarting - Remove the USB drive to boot into Ubuntu.
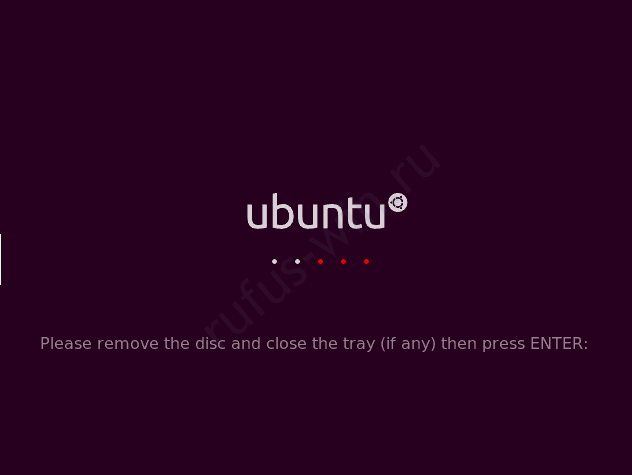
The first launch of Ubuntu. - Install any missing applications and get to work.