Let’s look at how to write an image to a USB drive using Rufus, what else the program can do, and which operating systems it supports. We’ll also cover which computer parameters and application settings are worth paying attention to.
Reinstalling an operating system starts with downloading an image containing its distribution. The contents of the ISO must be written to a USB drive, with a bootable area created on it beforehand. Simply copying files from an image mounted in a virtual drive won’t solve the problem. This is exactly what the Rufus utility was created for.
Rufus Features
This is a freely distributed utility with an interface available in many languages. It’s used to create a bootable area on flash cards and external hard drives and then deploy images to them. These include copies of installation disks, bootable CDs with applications and operating systems:
- client and server versions of Windows;
- DOS;
- three dozen Linux builds;
- LiveCD, Hiren’s BootCD, WinPE.
On Windows XP and Vista, the software runs up to and including version 2.18.
The utility was written by a developer from Akeo Consulting and ships with its source code. Rufus writes a bootable image to media and performs both quick and low-level formatting of the USB drive. It comes with an interface available in multiple languages.
Below we cover using Rufus to write a Windows 10 installation disk. Read the article about Linux here. About Hive OS here.
Utility Settings for Creating a Bootable USB Drive
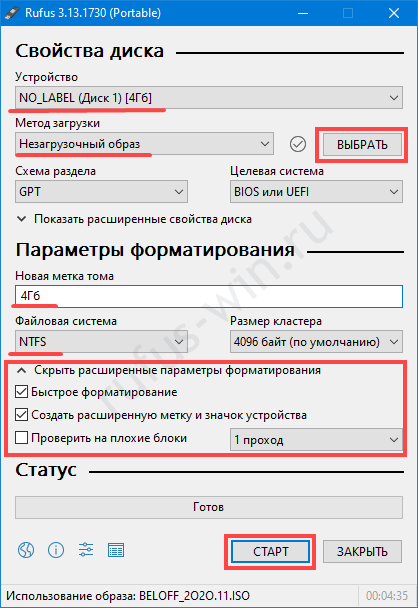
Configuring Rufus comes down to selecting the digital storage device to write the image contents to, choosing the ISO file itself, and specifying parameters to adapt the USB drive’s configuration to a specific PC.
Setting Up the Partition Scheme and Target System
On laptops and computers released over the last 8–9 years, UEFI has replaced the old BIOS. It can emulate the BIOS — working in a mode compatible with the legacy input/output system. The new firmware allows the OS to boot from partitions larger than 2.2 TB thanks to GPT partitioning. GPT replaced MBR. UEFI differs from BIOS in its boot process and expanded address space, which is why it starts up faster.
Installing Windows on GPT and MBR partitions requires a different bootable USB drive configuration. Check which scheme your computer uses:
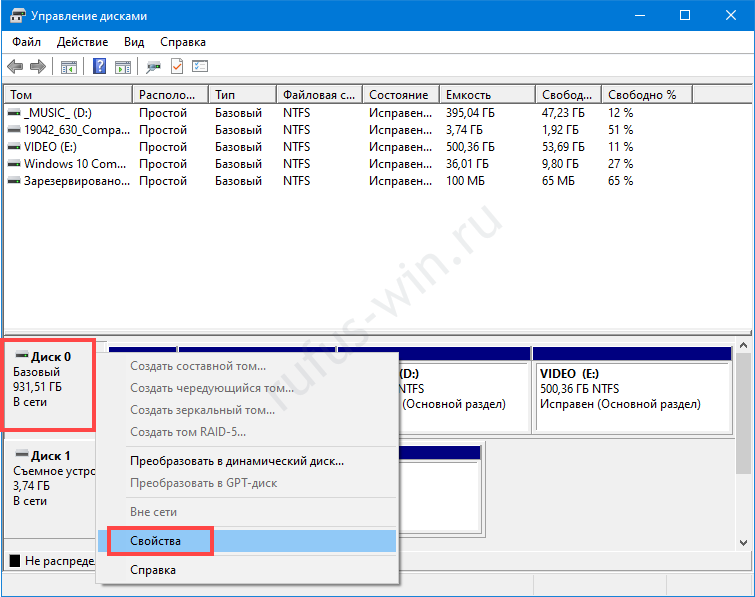
- Open the Disk Management utility through the Start context menu.
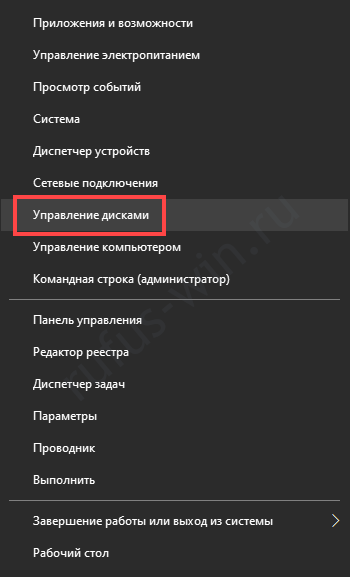
Disk Management. - Right-click the drive and select “Properties”.
Disk properties. - On the “Volumes” tab, look at the value of the “Partition style” field.
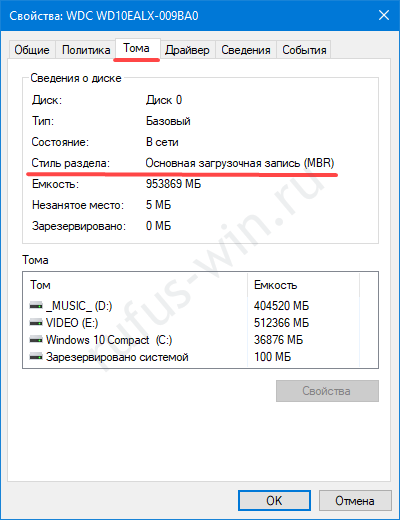
Determining the partition style (MBR).
Setting Up the File System Type
Due to the specifics of the boot process, the FAT32 file system (FS) is recommended for UEFI. For PCs with EFI and GPT, it’s enough to copy the image contents to a USB drive formatted as FAT32. Rufus isn’t required to create a bootable USB drive.
When working on an old computer with BIOS or UEFI running in compatibility mode (Legacy, UEFI-CSM), NTFS partitioning is required. Otherwise, you may run into problems with the USB drive being detected and installing Windows from it.
The UDF file system can be read on any platform and was created as an alternative to FAT to avoid issues with Microsoft patents. The main difference is that there are no file size limits like in FAT32 (4 GB).
exFAT was designed for portable devices. It doesn’t limit the number of files in a directory and features reduced data fragmentation.
Ext2 and ext3 are data storage structures for Linux.
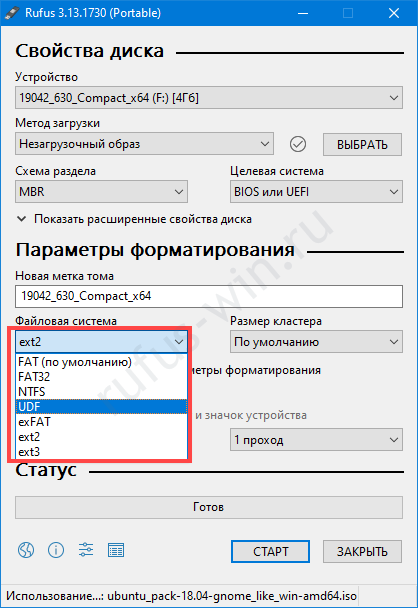
The cluster size and FS are determined automatically — don’t change them.
New Volume Label
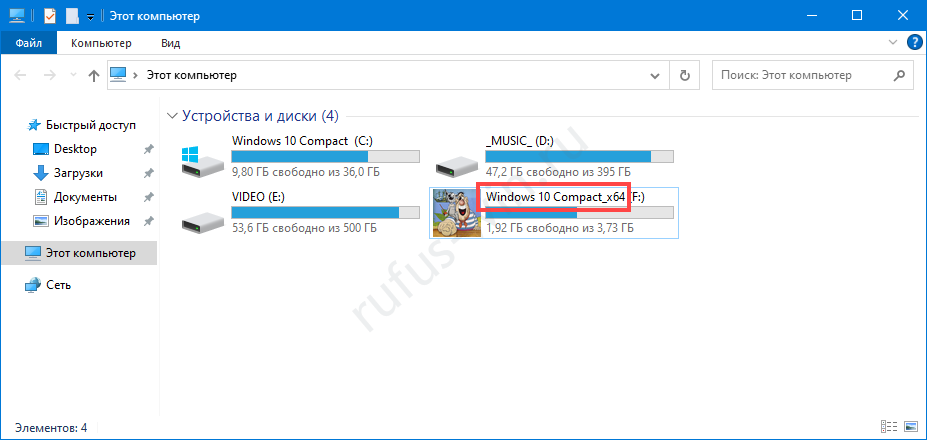
The label is the name of a digital storage device, specified before its drive letter. It’s used to identify the drive or partition. It’s copied from the image name, and after writing it can be changed the same way you rename files.
Selecting the Image Type for a Bootable Disk and Its Path
For self-bootable images, leave “Boot selection” unchanged:
- Click “SELECT”.
- Click the file and open it.
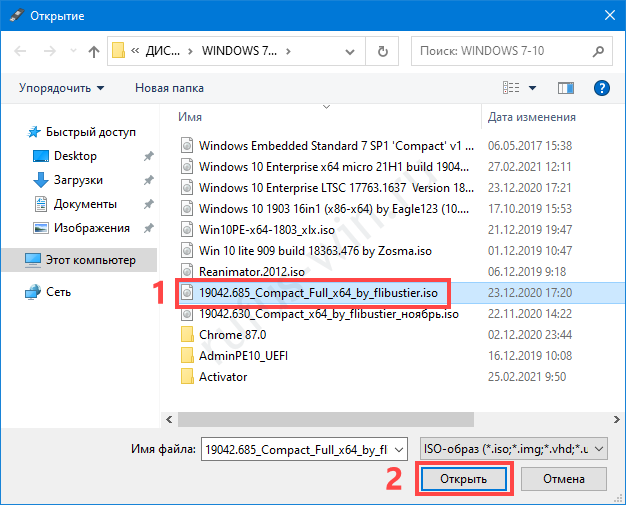
System administrators sometimes need to boot a computer under DOS. The “FreeDOS” method is provided for this purpose.
“Non-bootable image” writes the ISO contents to the USB drive.
How to Create a Bootable USB Drive in Rufus?
A drive you can boot a computer from is a tool for:
- installing an operating system;
- servicing SSDs and HDDs: partitioning, searching for damaged sectors;
- working with data: backup, recovery, transfer;
- starting a PC without an OS;
- hardware diagnostics (RAM);
- updating the BIOS firmware of the motherboard and video card.
Determining the PC Configuration
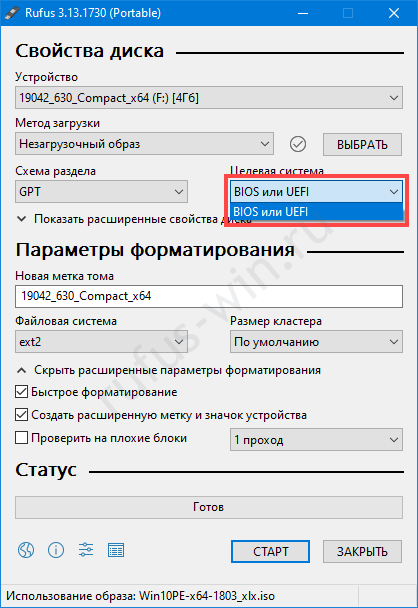
When creating a bootable USB drive from an image, the “Target system” is determined automatically based on the “Partition scheme”. In recent Rufus releases, it can’t be selected manually. With partitions:
- MBR sets the value to “BIOS (or UEFI-CSM)” or Legacy Mode — EFI in BIOS compatibility mode;
- GPT — “UEFI (non-CSM)”.
For non-bootable media, the “Target system” is determined as “BIOS or UEFI”.
Downloading a System Image for a Bootable USB Drive
Open the properties of the “This PC” directory and check the processor architecture.
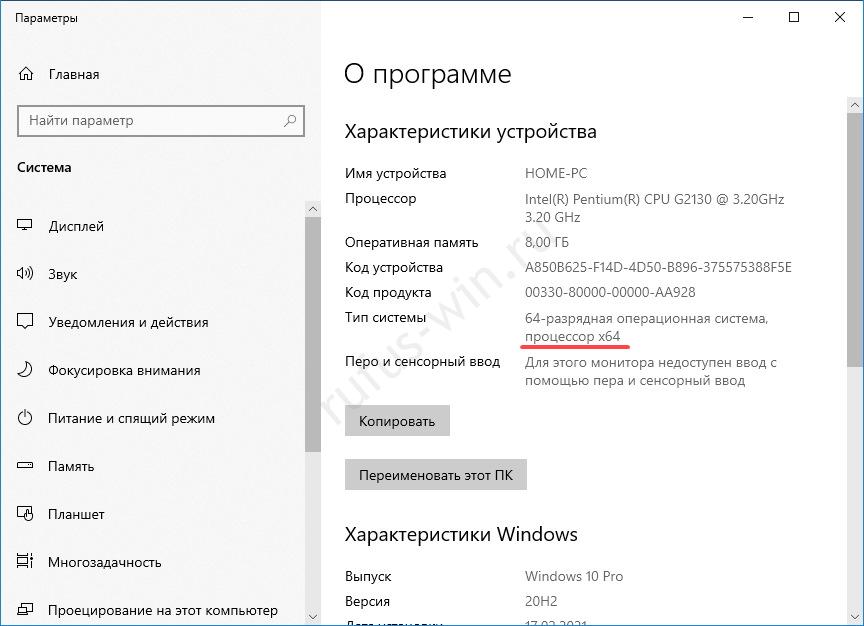
Download an OS image of the appropriate bitness. Windows is downloaded from the Microsoft website (more details at the link), and Linux distributions are distributed for free on official resources.
Alternatively, download the original image from a torrent tracker after reviewing feedback from other users. As for custom builds, especially Windows with spyware features disabled and unnecessary features removed, download them at your own risk.
Writing an Operating System Image to a Bootable USB Drive
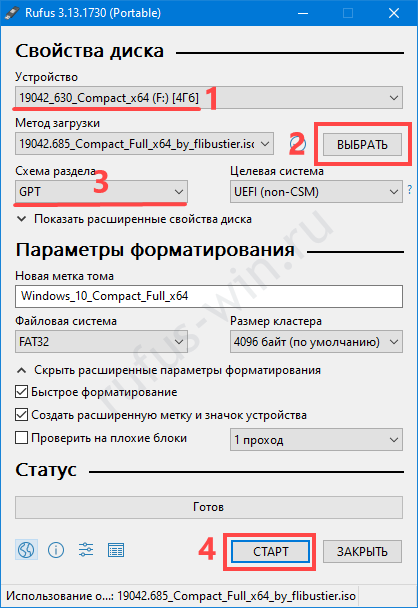
Make sure to back up the files on the USB drive — they get deleted during the process of writing Windows via Rufus. Once the preparatory stage is complete, launch Rufus.
Select:
- The media from the list.
- The ISO file.
- The partition scheme: GPT or MBR.
- Then click “START”
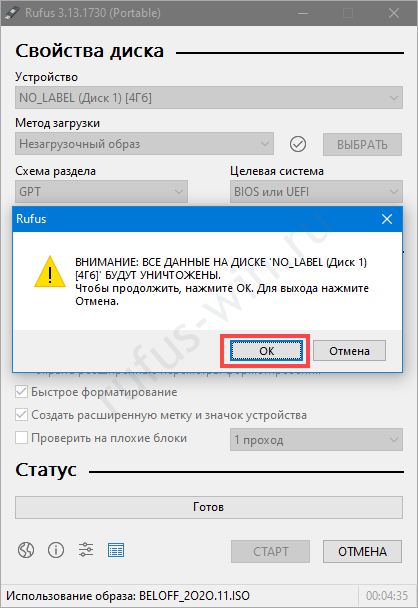
- Confirm formatting the device.
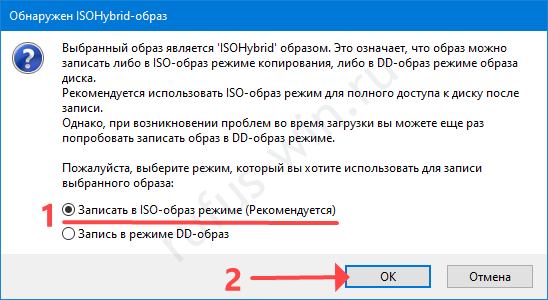
In the case of hybrid images, a window with action options will appear — select the first one.
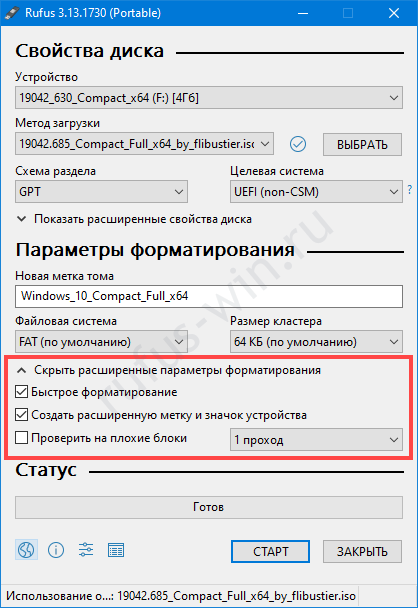
Optionally, in Rufus you can:
- change the label;
- choose the formatting method;
- check the memory for damaged blocks (cells);
- add an icon from the image to the USB drive.
How to Format a USB Drive Using Rufus
Rufus automatically formats the drive after you click “START” and confirm the operation. There’s a function to forcibly wipe the disk: removing partitions, the label, and a full format with recovery of logically damaged sectors.
Select the media, press Alt + Z, and confirm the wipe.
After it’s done, the USB drive will need to be formatted through “Disk Management” or Rufus. It will no longer appear in Windows Explorer.
Non-Bootable Image in Rufus
Rufus will unpack the contents of the ISO file to the drive without creating a bootable area on it:
- In the “Boot selection” field, specify “Non-bootable…”.
- Choose the ISO, the file structure, and additional parameters.
- Start writing, first clearing the contents of the USB drive.