Two decades after its release, Windows XP still runs on around 1.2% of personal computers — but that’s still millions of machines. These “old-timers” running XP are found in offices, archives, on cottage computers, and among conservative users. Burning the operating system to a CD for reinstallation isn’t practical. We’ll show you how to create a bootable USB drive with Windows XP using the Rufus utility.
Creating a bootable Windows XP USB drive
Bootable drives are used to reinstall the operating system or to boot a computer without an OS. They come in handy when working with service and diagnostic utilities, antivirus tools, and programs for managing partitions and backups. Without such a drive, it’s not always possible to restore Windows or reset account passwords.
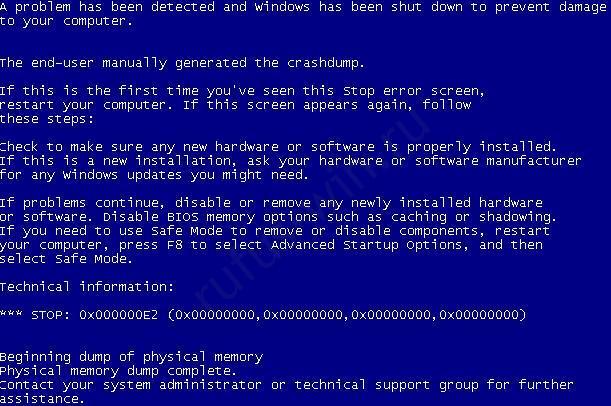
Windows XP support ended in 2009 (except for critical updates), and in 2014 Microsoft closed the project for good. The version for ATMs and other highly specialized devices was discontinued in 2019.
How to download a Windows XP image for a bootable USB drive
Owners of old computers will have to look for the Windows XP image on third-party sources. It’s no longer available on the Microsoft website. Download it from trusted forums or torrent trackers. Get the version with Service Pack 3, or the Professional x64 Edition (for 64-bit processors).
You can find out your CPU’s bit depth, for example, by running the “msinfo32” command in the Win + R dialog.
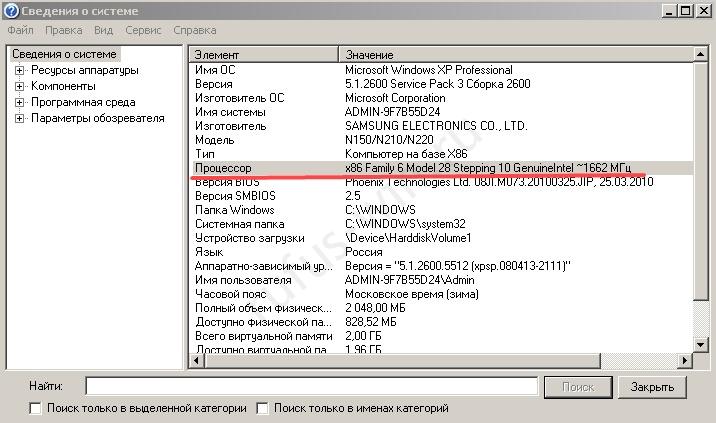
Three things matter here.
- Read the build description carefully: what the author did to the original image, what was removed, added, or changed.
- A disk controller driver that allows the drive to work in AHCI mode is essential.
- Make sure the drivers for new devices and the applications you need (especially newer ones) will run on XP.
Determining your PC configuration
If you have a PC or laptop with BIOS, move on to the next section. If you need to install XP on a computer with GPT partitions rather than MBR, use a virtual machine (Virtual Box, for example). It’s faster, without the headaches and frayed nerves.
Writing a WinXP image to a bootable USB drive with Rufus
To write the Windows XP image to a USB drive, we’ll use Rufus (you can download it here):
- In the first list, select the device to write to. (First copy any files off the drive, since the app will erase them.)
- Click “Select.”
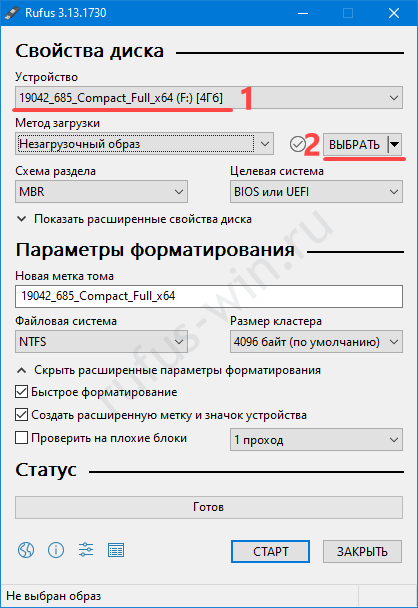
Selecting the USB drive. - Specify the path to the ISO image and click “Open.”
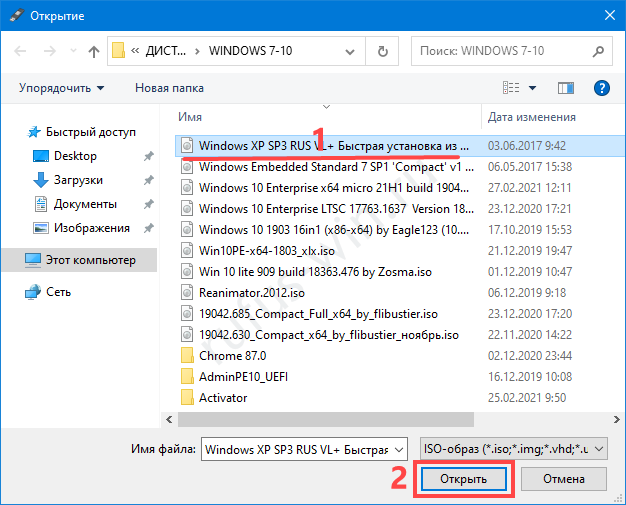
Opening the file. - Partition scheme — “MBR.”
- “New volume label” — the name of the USB drive (optional).
- Choose the “Advanced options…” at your own discretion. The target and file systems are detected automatically.
- Leave the rest as is and click “Start.”
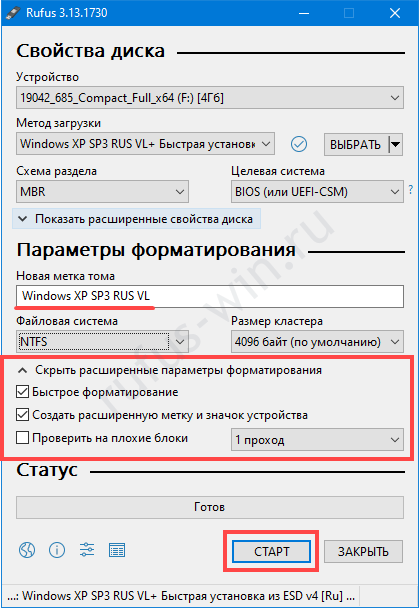
Drive properties. - Confirm formatting the USB drive with permanent deletion of the files on it.
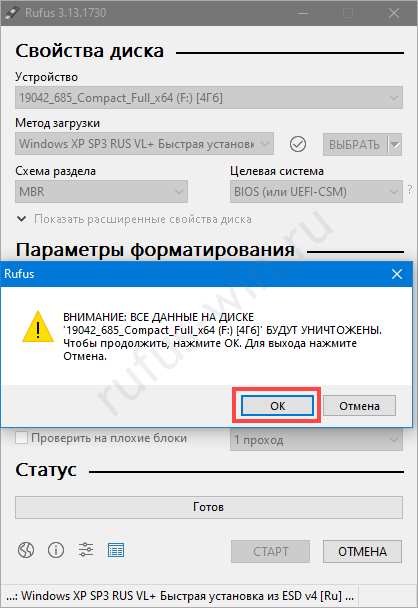
- Now wait — it won’t take long.
Installing Windows XP on a computer from a bootable USB drive
The XP installation time depends on many factors: the amount of RAM, processor speed, the state of the file system, and the amount of free space on drive C:\. It’s slower than installing later versions (7, 10).
Preparing the BIOS to boot from a USB drive
To deploy the OS from a USB drive, you need to tell the computer to look for the boot area not on the hard disk, but on the removable drive.
Beforehand, move any files you need off drive C:\ (Desktop, My Documents).
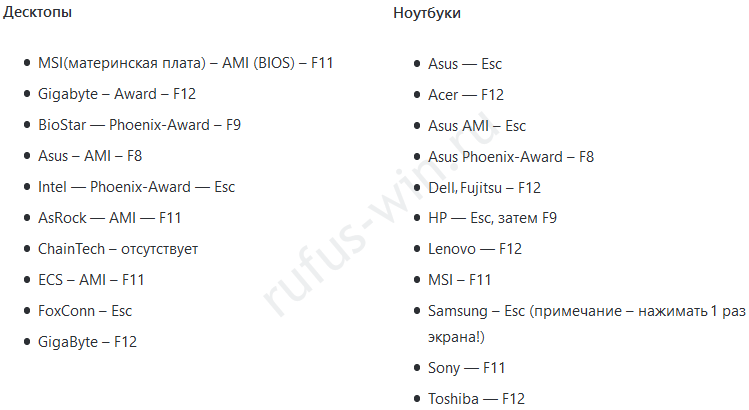
- Restart the computer, and once the splash screen with the prompt to enter the BIOS appears, press F11 or Del or something else a couple of times.
- Select the USB drive from the list.
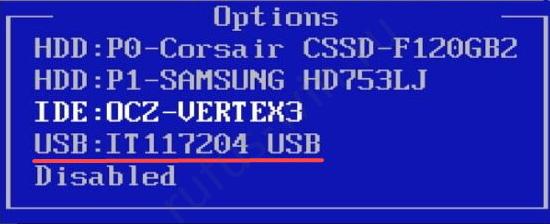
Selecting the boot media.
Installing Win XP from a bootable USB drive
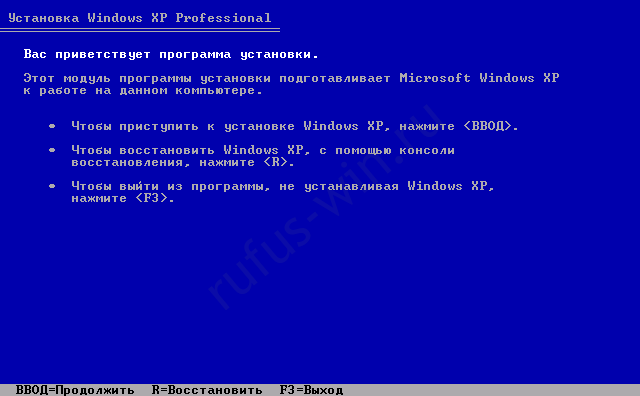
After a few minutes of preparation, press “Enter.”
When using custom builds, most steps are skipped — the answers (settings) are stored in a configuration file.
Let’s walk through the example of an original image from Microsoft:
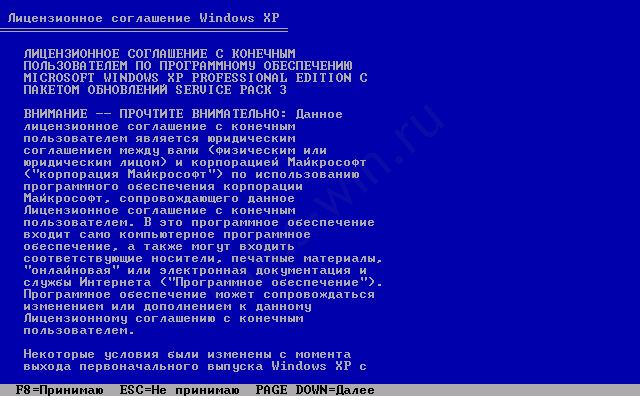
- Read the license agreement and press F8 to accept the terms.
- Press Esc to continue.
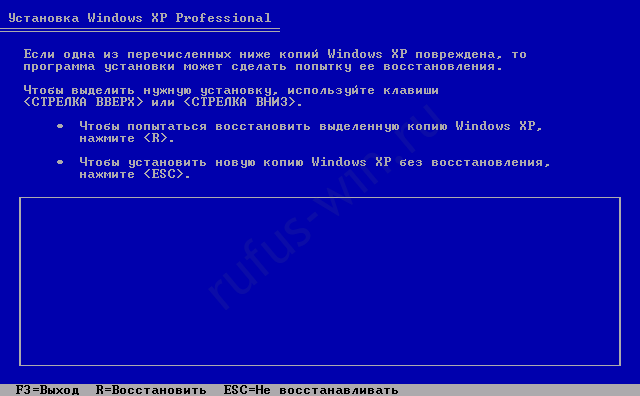
- Choose the system partition.
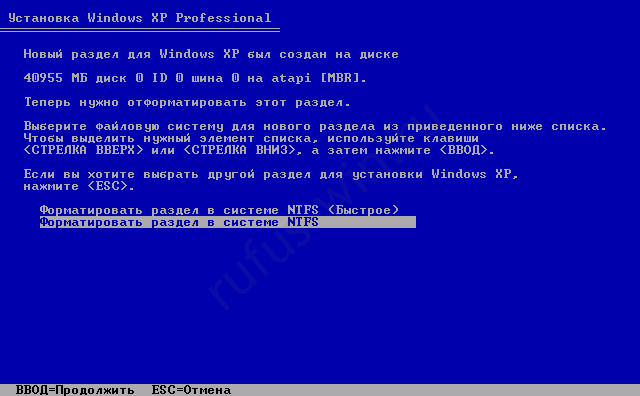
- Change the volume’s file system (we recommend NTFS). Select quick formatting if you’re confident there are no problem sectors on the disk, or the second option to detect and fix them.
- After formatting, the files will be copied and unpacked from the USB drive to the hard disk.
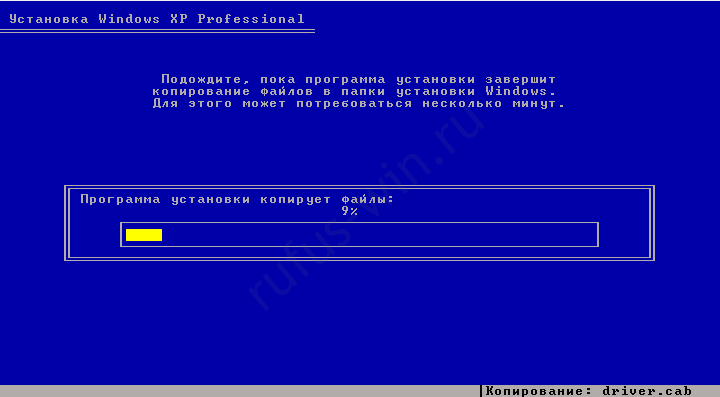
- The computer will restart, after which the file unpacking and installation will begin.
- Choose your regional standards.
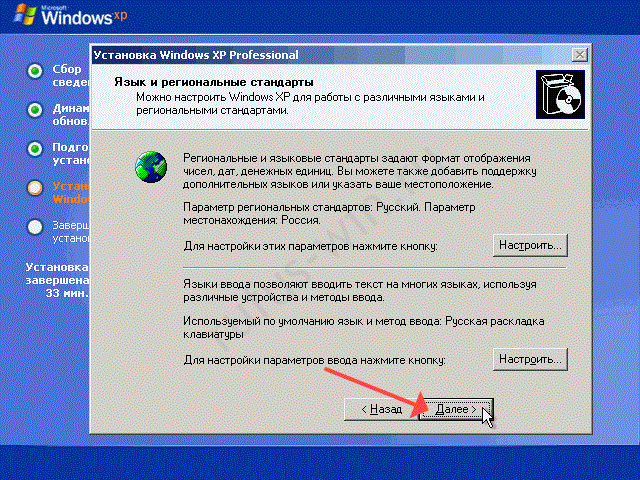
Selecting the language and regional standards. - Enter the product key.
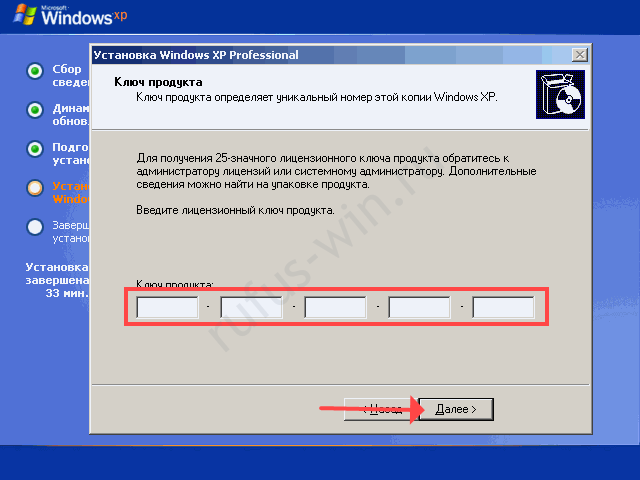
Product key. - Set the time, time zone, and date.
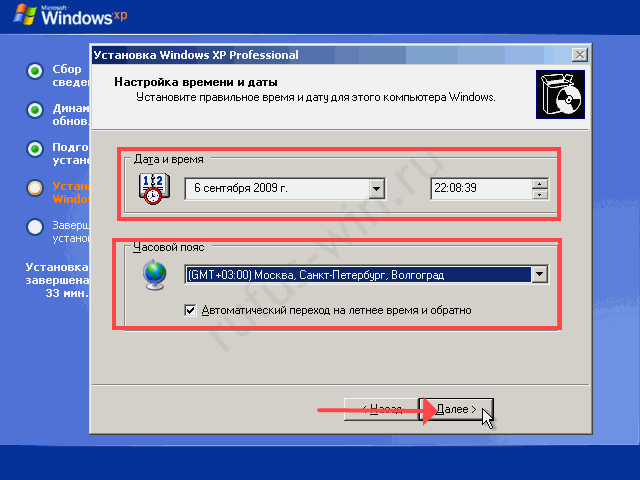
Setting the time and date. - Configure the workgroup. In the setup wizard, click “Next.”
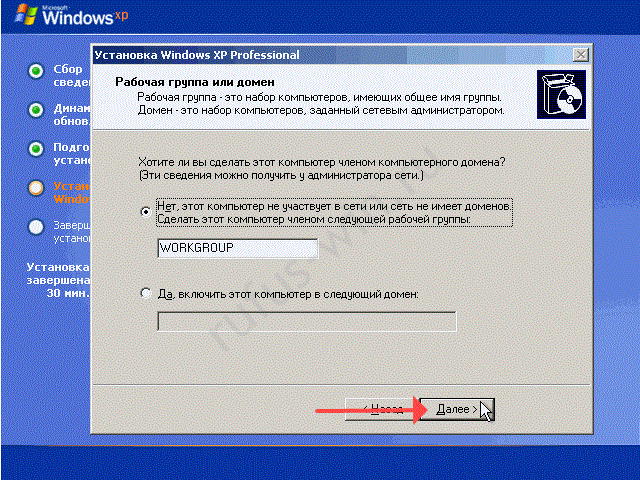
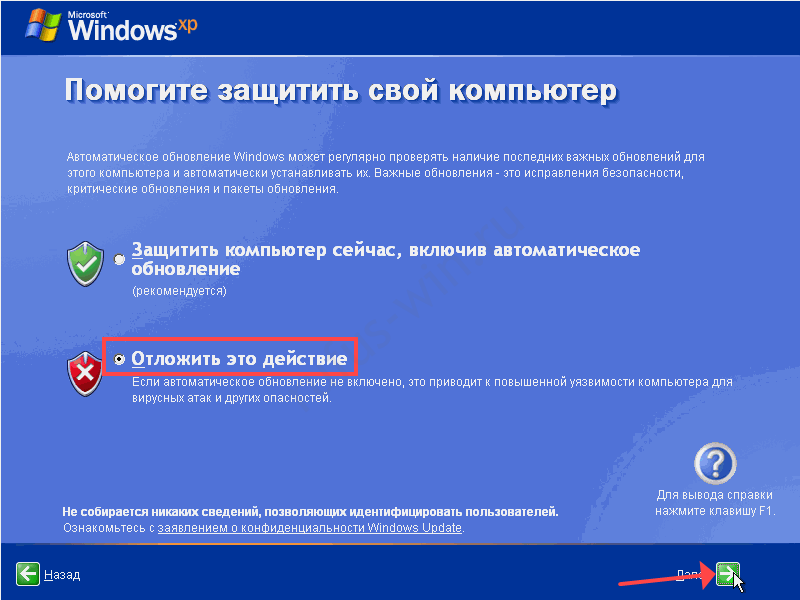
Configuring the workgroup - Skip the antivirus
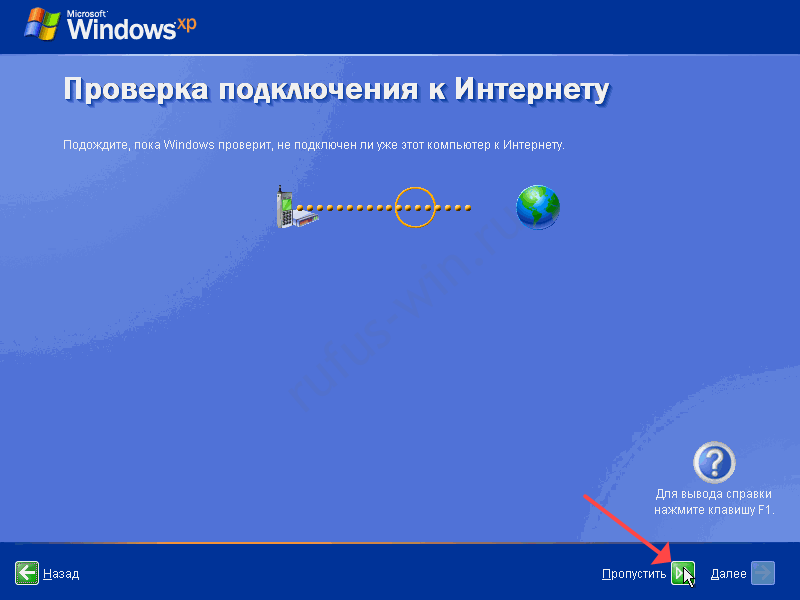
- Skip the network connection setup.
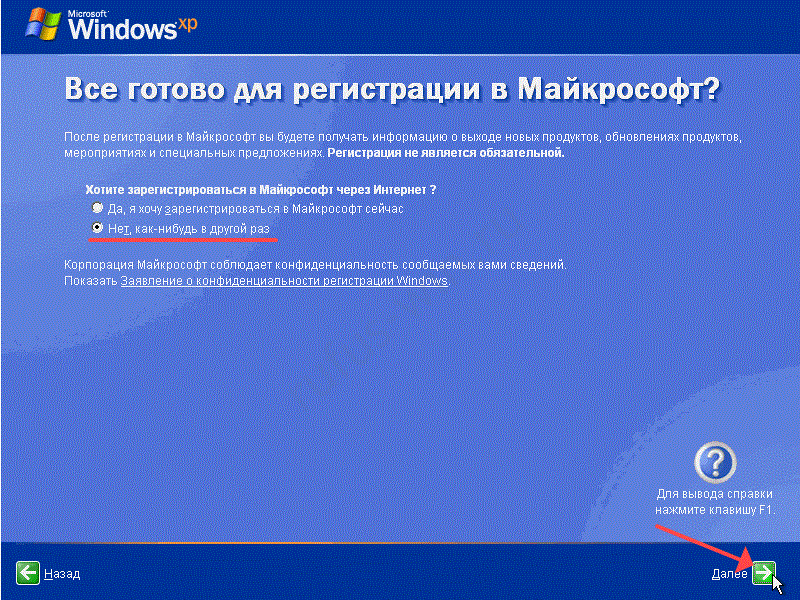
- Decline registration.
- Click “OK” for automatic graphics configuration.
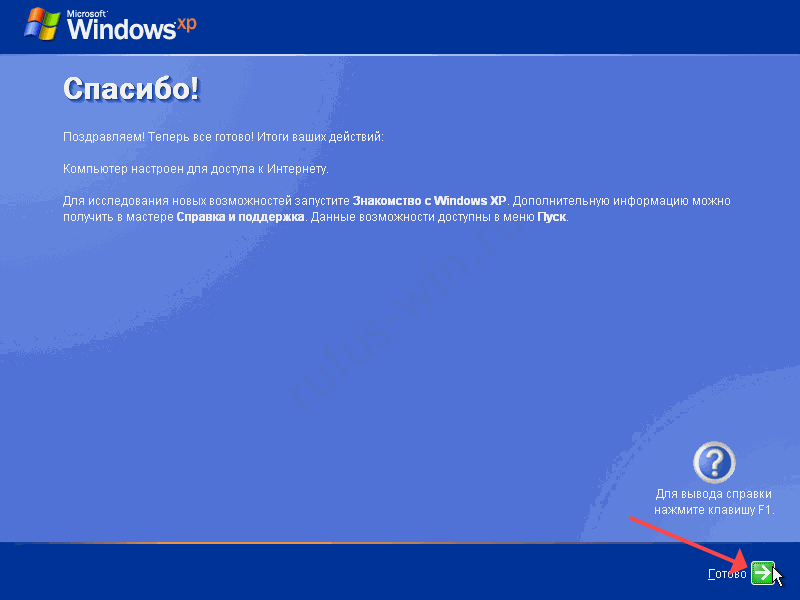
- The Desktop will load.
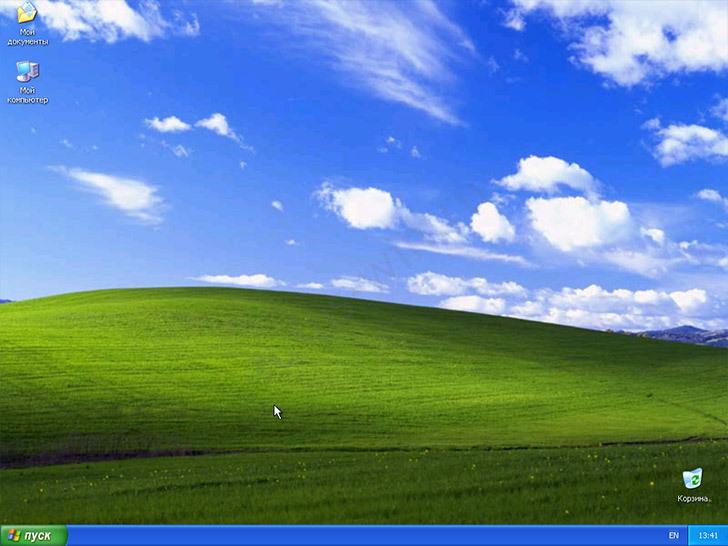
The Desktop. - The old-school XP-era desktop is a treat for the eyes!
Questions and answers
Having trouble writing the image to a USB drive? Something unclear about the installation? Describe your situation and we’ll help.