Windows 7 hasn’t become a thing of the past. On older computers, this OS remains relevant well into its second decade. Even in the first years after its release, “Seven” was installed primarily from bootable USB drives, while discs faded into history. Let’s look at where to download an image for deploying Windows 7 for free and how to create a bootable USB drive from it using Rufus. We’ll cover the nuances of the process and go step by step through deploying the OS on a desktop or laptop.
Creating a Windows 7 bootable USB drive
A USB drive with a boot area is used for:
- reinstalling operating systems;
- recovering Windows and eliminating critical errors;
- running applications – antiviruses, diagnostic tools; utilities for backup, data recovery, and partition management;
- booting a desktop or laptop from a USB medium: LiveCD, WinPE;
- resetting a lost password for signing in to a local account.
Determining the PC configuration
If you have an old computer with BIOS and/or MBR partitions, or UEFI with GPT partitions, proceed to the next subsection. If you don’t know, check:
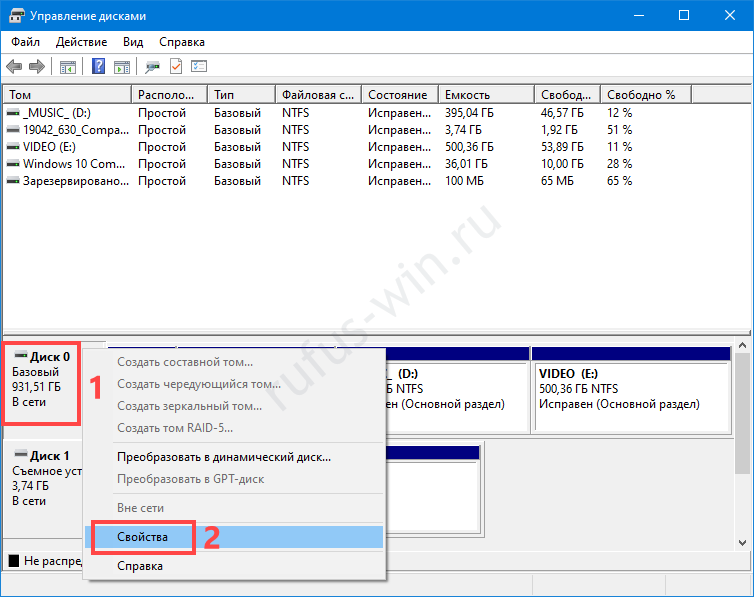
- Right-click Start and select “Disk Management”
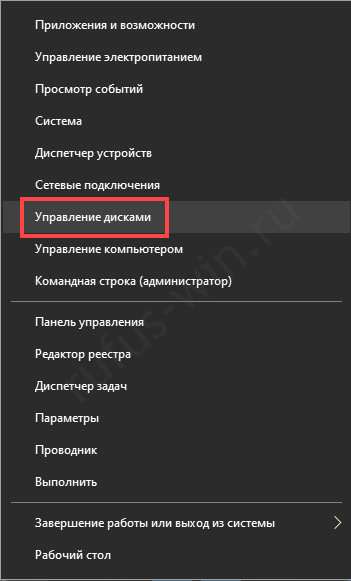
The WinX menu. - Open the “Properties” of the boot disk (not the partition).
Volume properties. - Look for the information in the “Partition style” line.
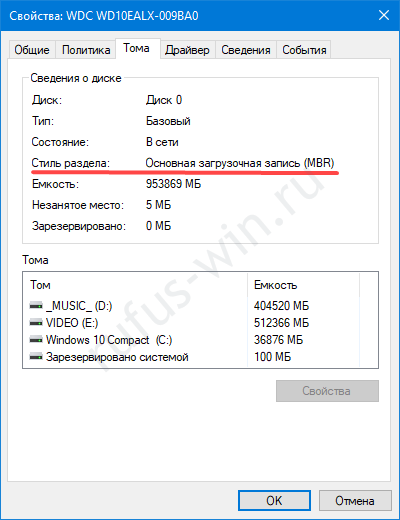
Configuring the BIOS
Sometimes problems arise with detecting the bootable USB drive or installing Windows 7. If you have MBR, UEFI must run in the legacy Legacy mode or UEFI-CMS (compatible with BIOS).
To switch the mode, enter BIOS Setup when turning on the computer (usually with the F2 or Del key). On Windows 10, you first need to disable “Fast Startup”.
The next steps depend on the firmware and its interface; refer to the manual for your motherboard or laptop.
Let’s take an ASUS motherboard as an example:
- On the “Boot” tab, go to the “CSM (Compatibility Support Module)” section.
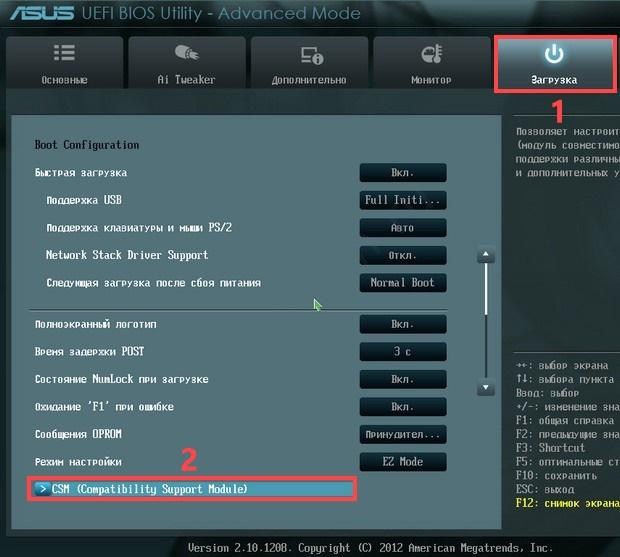
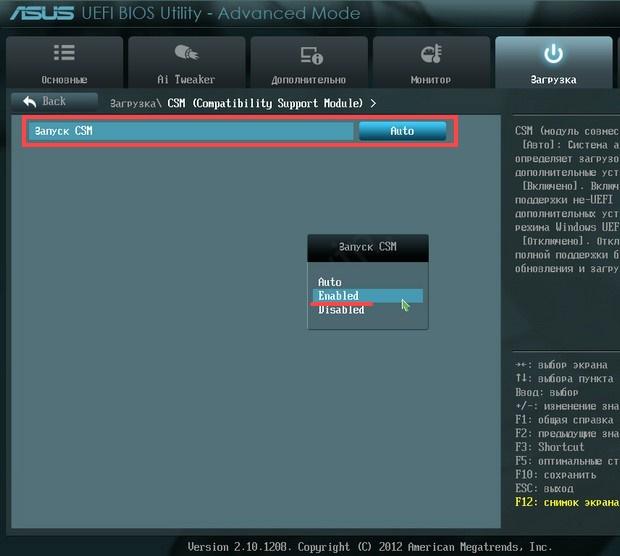
- In the list of options, select “Enable”.
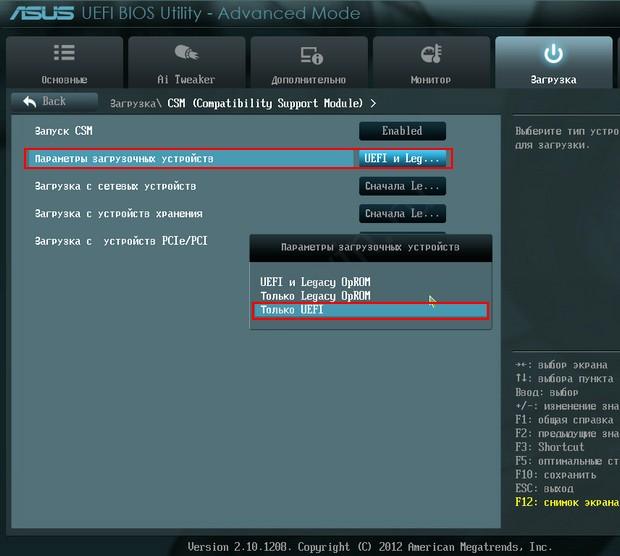
- Set “Boot Device Control” to “UEFI only”.
- Exit the settings and save the changes – the F key.
Download the system image for the bootable USB drive
Download the original “Seven” images for writing with Rufus from the official Microsoft website if you have a license key, or via torrent.
A working license key can be found online in just a few minutes. For obvious reasons, we cannot distribute keys for licensed products.
Writing a Windows 7 image to a bootable USB drive
Once the distribution and utility are downloaded, follow these instructions to write the Windows image to a USB drive using Rufus:
- Copy the files off the drive, as they will be destroyed.
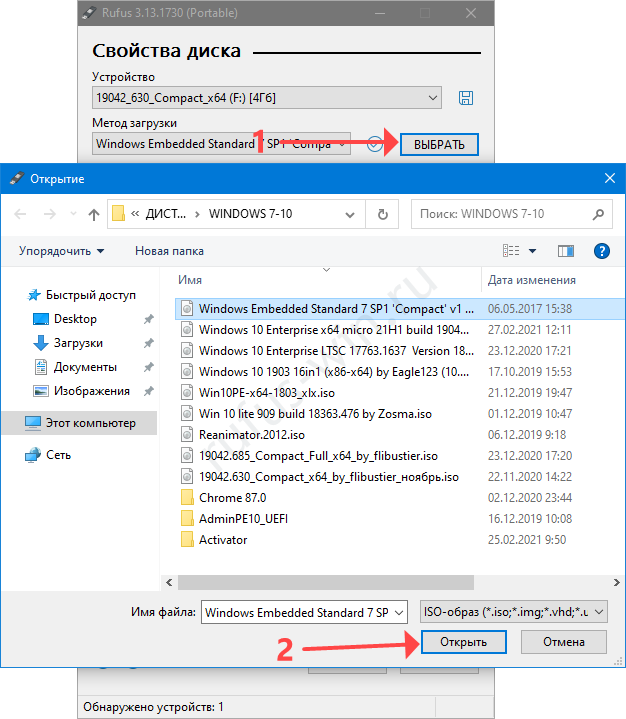
- Launch the program and select the target USB drive in the first list.
- Click “Select”, specify the path to the image, and open it.
- Decide on the HDD/SSD partition scheme (described in the “Determining the PC configuration” section).
- Rename the device (optional).
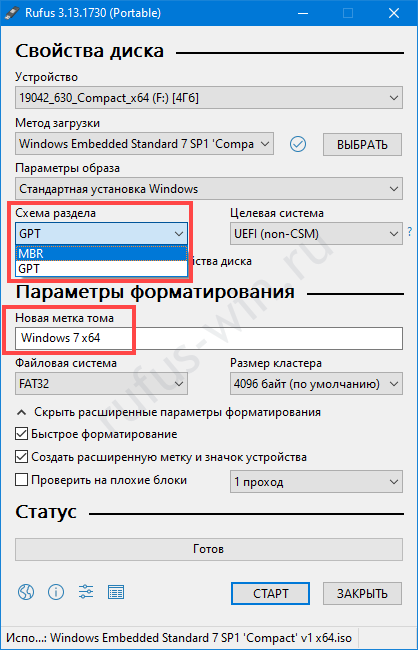
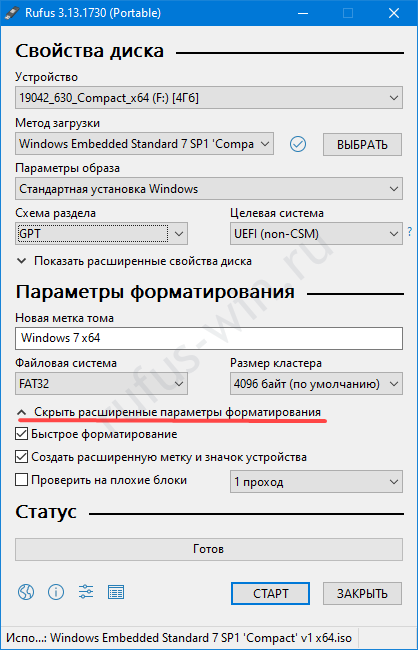
Partition scheme and volume label. - In the advanced Rufus options, uncheck “Quick format” and enable “Check device for bad blocks” if you’ve had problems with the drive. The utility will fix damaged sectors and avoid writing data to bad cells.
Open the advanced format options. - To run the ISO image via Rufus, click “Start” and confirm formatting the USB drive.
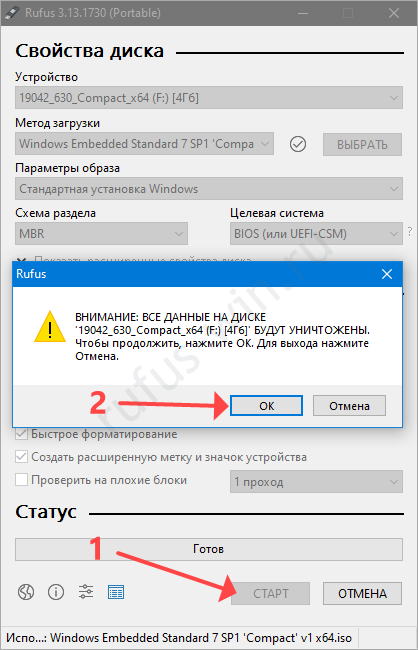
The data will be deleted and partially overwritten.
Preparing the BIOS to boot from the USB drive
To boot the computer from a USB drive in Windows 10, disable “Fast Startup”, more details in the article. After the POST procedure completes (when the splash screen offering to enter the BIOS appears), press the key to open the Boot menu (F11 or F12).
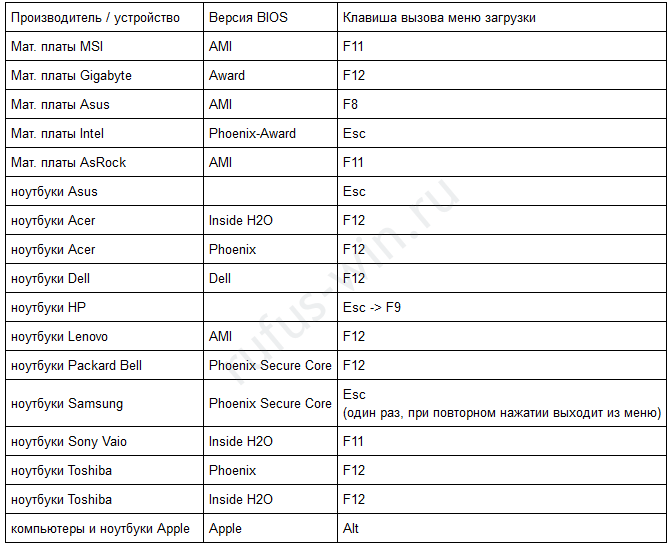
In the list, click the USB medium. If your hard disk or solid-state drive uses GPT partitions, choose the option with “UEFI” before its name.
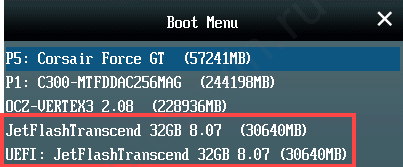
Alternatively, you can change the boot device priority in the BIOS, but after the first PC restart, place the USB drive below the HDD or SSD.
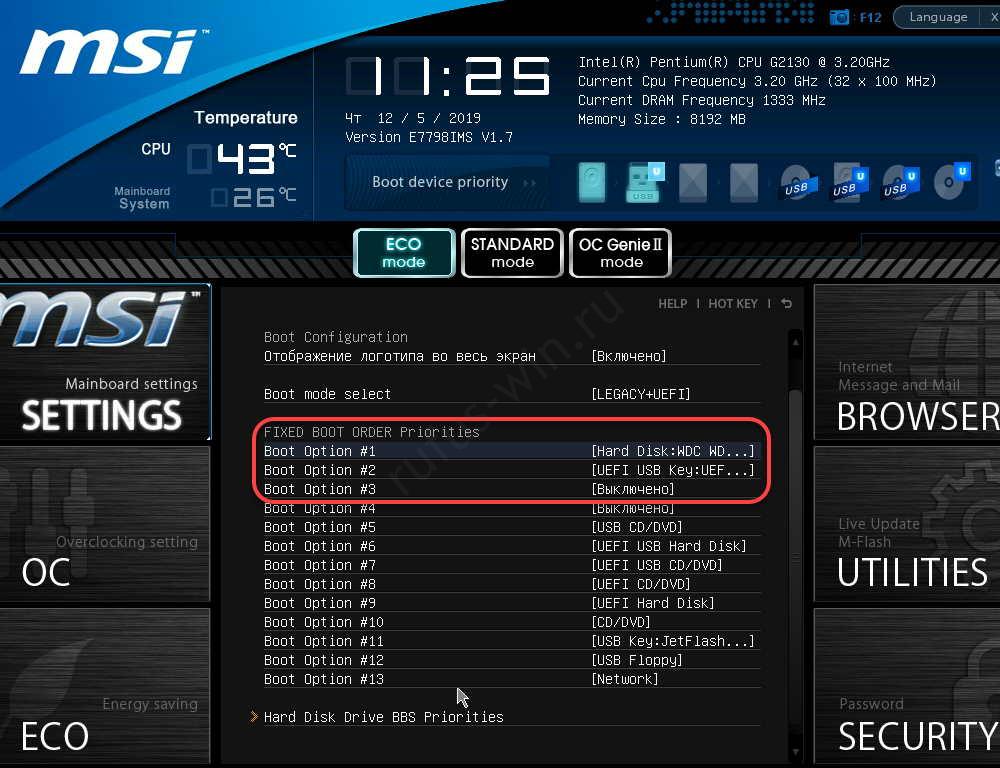
Installing Windows 7 from a bootable USB drive
After turning the computer on again and booting from the USB drive, press any key on the black screen displaying “Press any key…”.

- Click “Install now”.
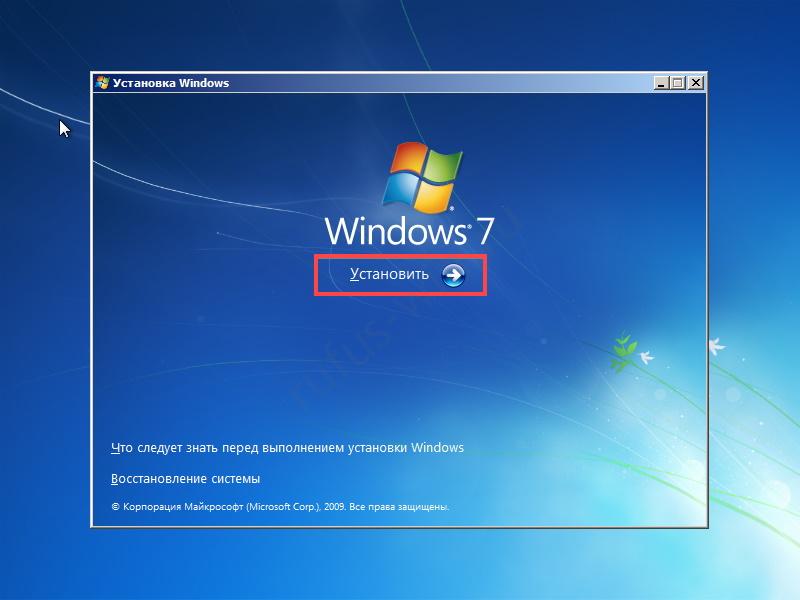
- Accept the terms of the license agreement.
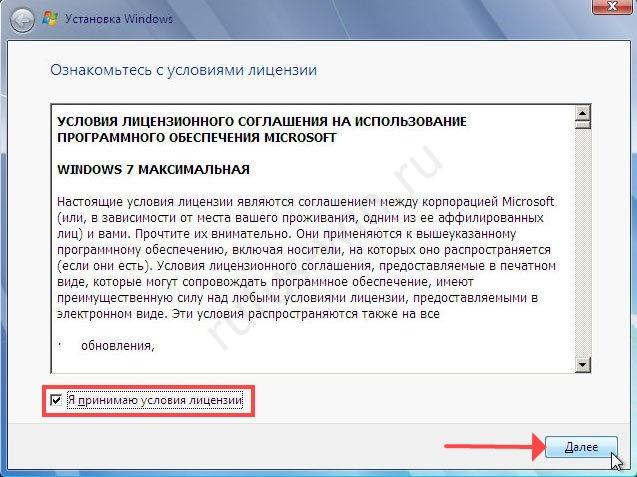
- Choose the “Custom (advanced)…” option.
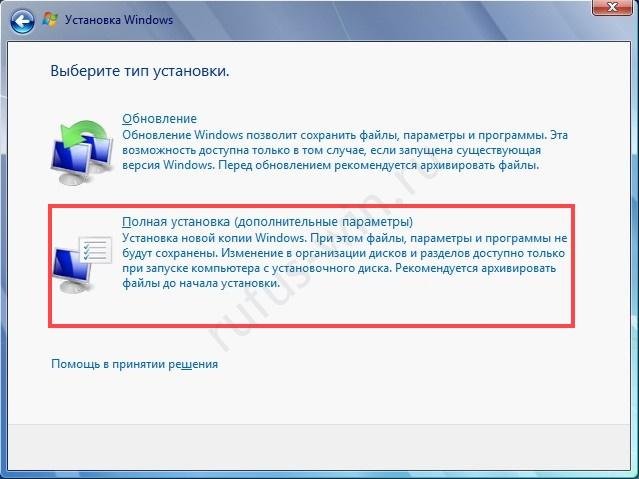
Installation type - Decide on the system drive and click “Next”. There are many options depending on the HDD/SSD configuration: deleting the old one, creating a new one.
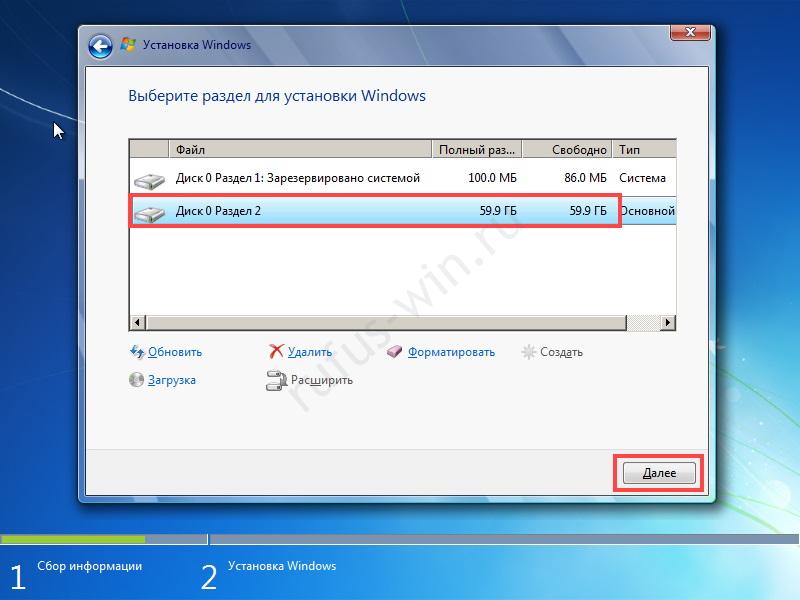
- The unpacking and copying of files will begin.
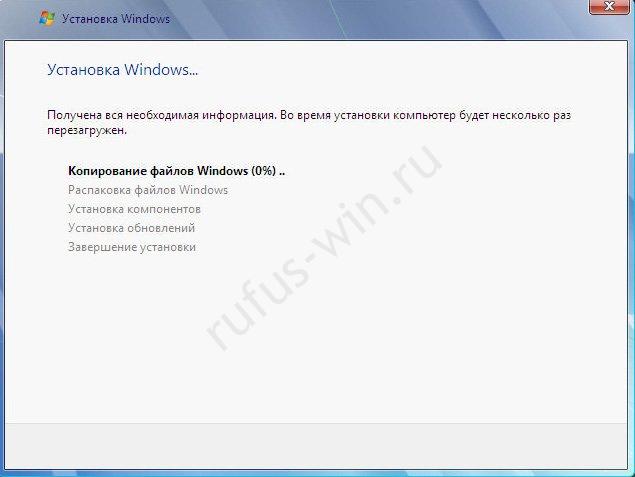
Copying files - Then wait: the computer will restart, and the installer will prepare Windows for its first launch.

- Enter the user name and the computer name.
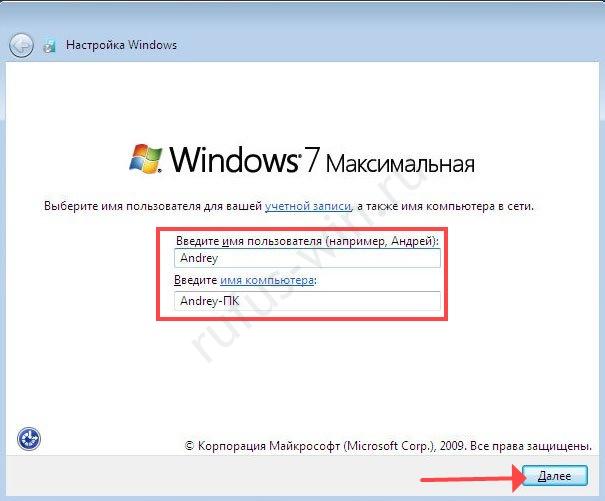
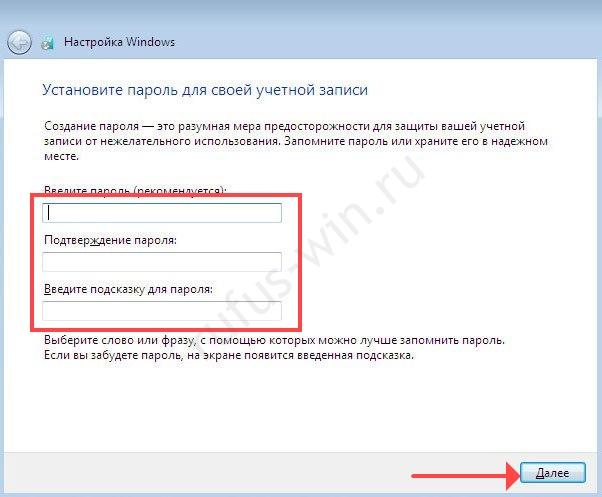
- Set a password for signing in to the account.
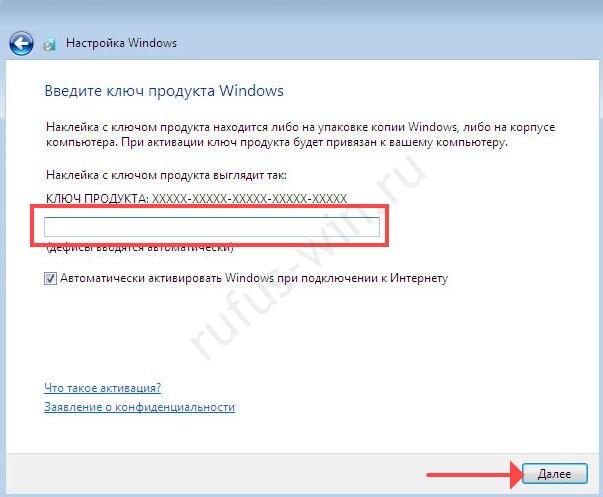
- Enter the product key or skip this step.
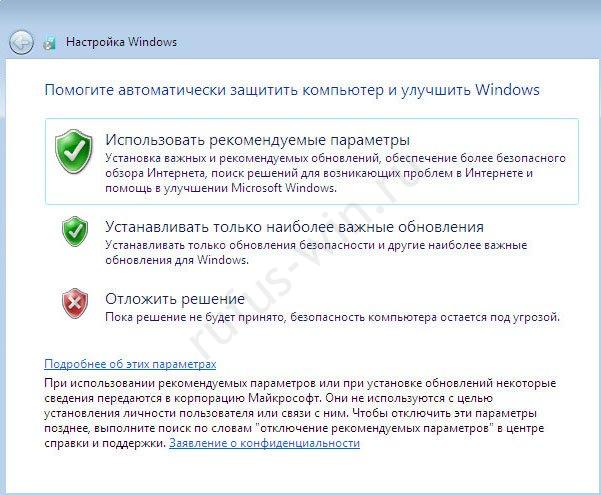
Product key - Configure Windows Defender or postpone the decision.
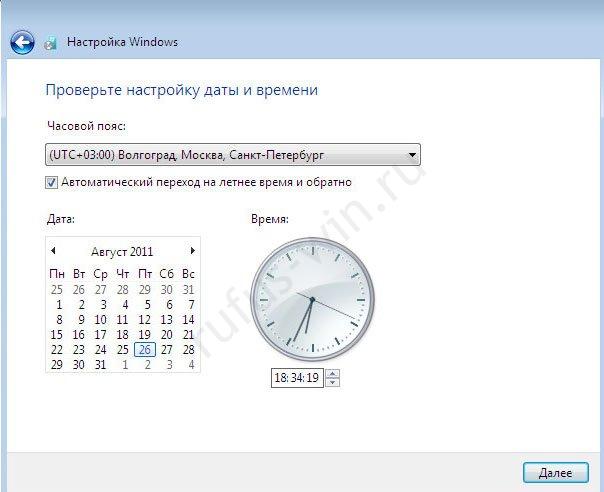
- After setting the time, selecting the time zone, and configuring regional settings, the Desktop will appear.