To install the Windows 10 operating system, you need to create a bootable USB drive. This is handled by a tiny utility called Rufus. Let’s take a look at what it’s capable of in this review.
The application lets you create a bootable Windows 10 USB drive in just 3–5 minutes. It works with USB drives, Pen and Key disks, and memory cards (for phones and cameras). It adapts the device to work with computers using BIOS, UEFI, and MBR or GPT partition schemes. It’s 1.5–2 times faster than its counterparts.
How to create a bootable Windows 10 USB drive
USB drives with a boot area solve a number of user problems:
- clean installation of the operating system;
- OS recovery;
- creating disk (partition) images and restoring them from backups;
- removing viruses and malicious applications;
- working on a computer or laptop without an OS;
- recovering deleted files;
- diagnosing and testing hardware components, for example RAM or an HDD;
- transferring the OS or partitions to another drive;
- gaining access to data on a computer’s disks when it has no operating system or when the OS won’t boot.
Rufus is a portable utility that does not require installation.
Determining your PC’s configuration
The outdated BIOS and its alternative, UEFI, look for the bootloader and start a computer or laptop in different ways. The former builds a list of possible boot devices after hardware self-testing is complete. It reads the MBR from the first drive in the list and hands over control of the boot process to it.
UEFI looks for a partition with a working GPT table. Instead of searching for a device and a partition with an MBR, the EFI drivers begin loading Windows right away, which speeds up the process.
Booting a PC with BIOS and booting UEFI in Legacy mode are similar.
Since 2012, motherboards have been shipping with UEFI instead of BIOS. If your PC is about ten years old, it definitely boots through the BIOS. For newer motherboards, you can check how Windows starts — through BIOS or UEFI — in three ways.
System Information:
- Press Win + R, type “msinfo32”, and press “Enter”.
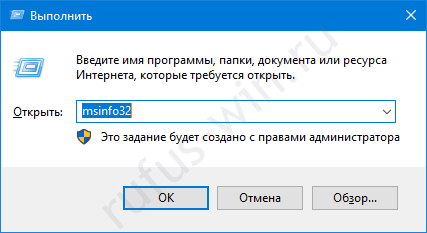
Opening System Information. - Look for the “BIOS Mode” line.
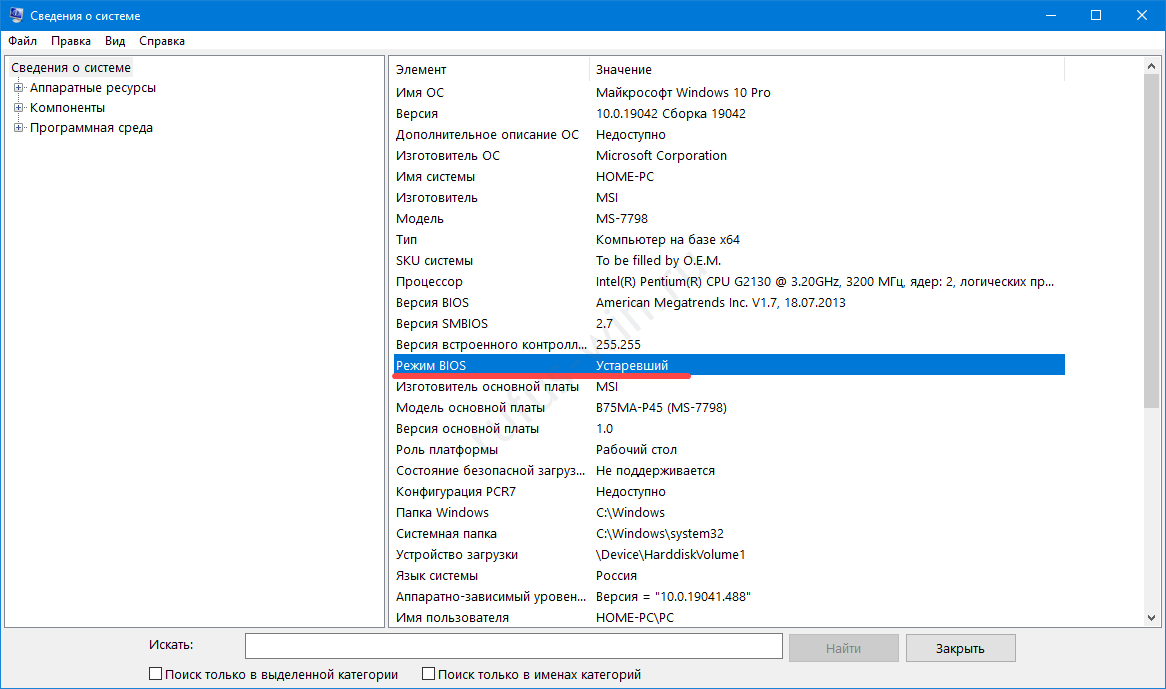
Legacy mode due to using an HDD with an MBR rather than a GPT. - The command also works in search. HWiNFO: launch the program and look for the “UEFI Boot” line.
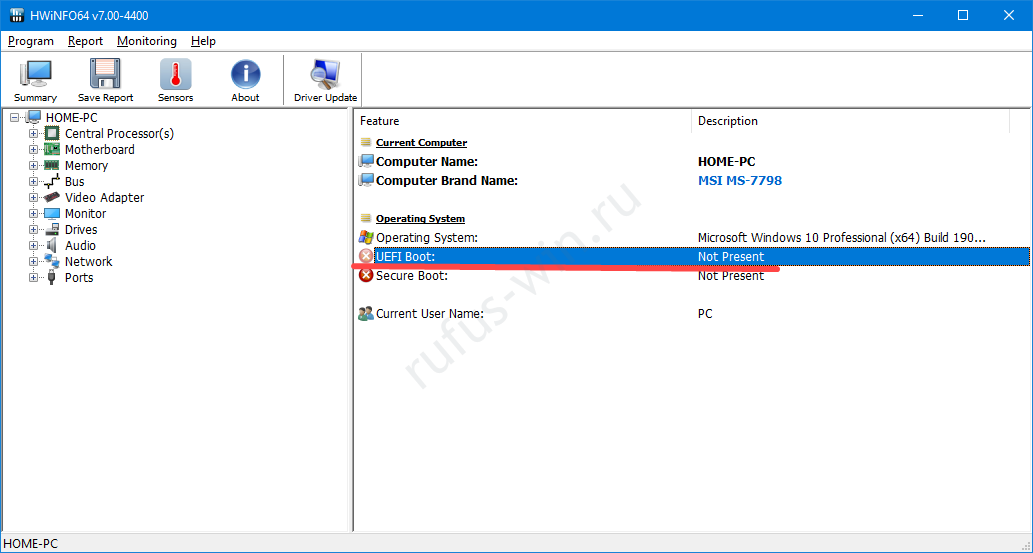
The icon tells you everything without a single word. - After restarting the computer, enter the BIOS settings.
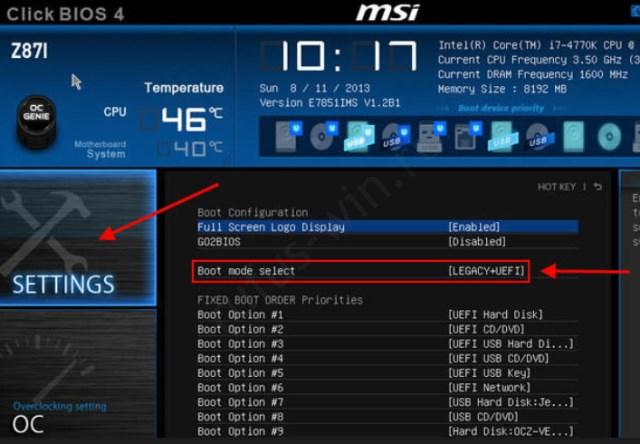
Look for the option on the main screen or in the first section.
Disk Management
- Open the tool by right-clicking the Start button.
- Click the “Reserved…” partition.
- If the status is “Healthy (System, Active…)” it’s BIOS; “Healthy (EFI System Partition…)” means UEFI.
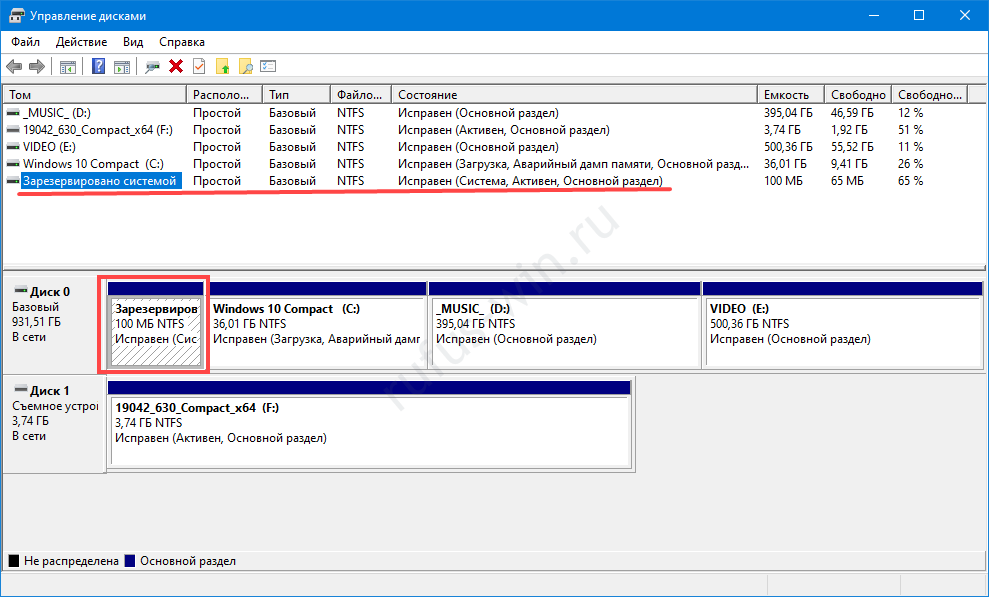
Disk Management. - You’ll need this information later to create a bootable Windows 10 USB drive with Rufus.
How to download a Windows 10 image for a bootable USB drive
Fans of free operating systems and software prefer customized Windows 10 builds cleaned of unnecessary files. We recommend using official installation images downloaded from the Microsoft website or from trusted torrent sources.
Note. If you decide to get a build, carefully review the comments and description: what has been removed and changed. Do not download universal builds with a dozen OS variants on a single drive.
- Visit the official page for downloading Windows 10.
- Click “Download tool now”.
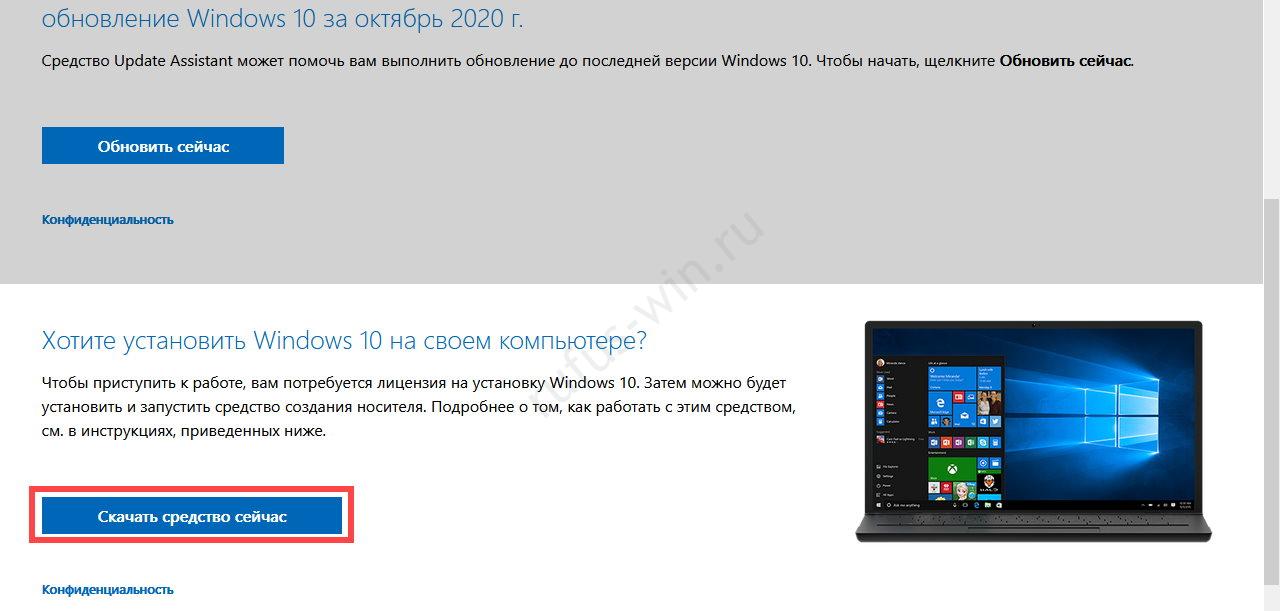
Downloading Windows 10 from the official Microsoft website. - Accept the terms of use.
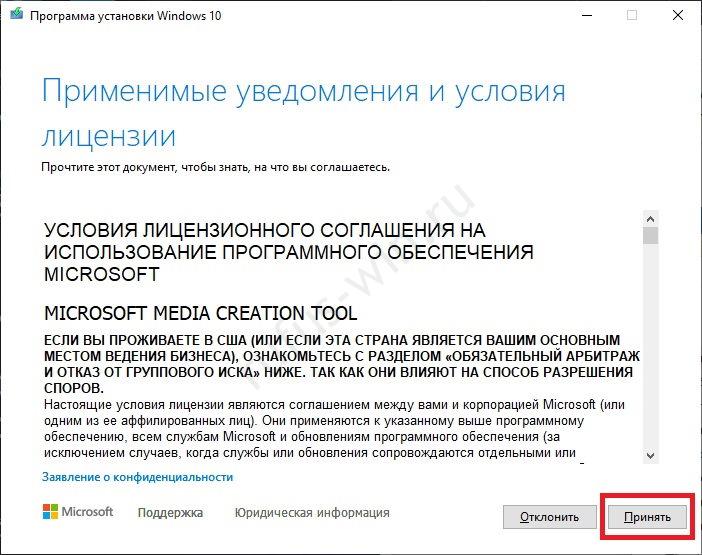
License terms. - Choose the second option to download the image.
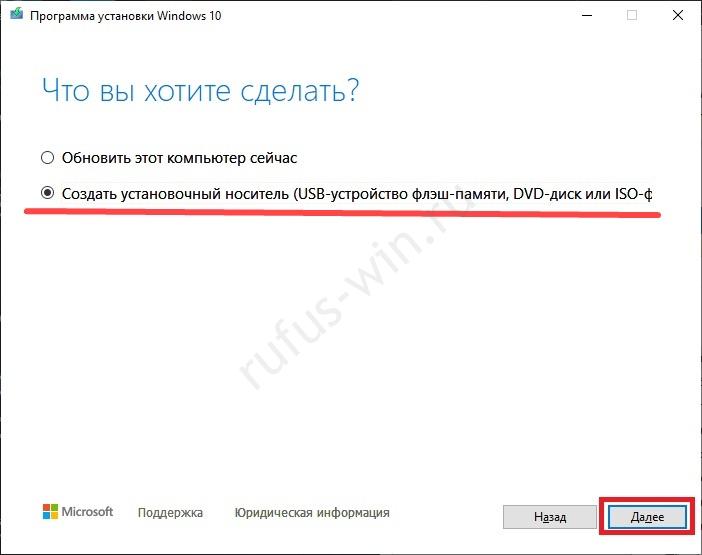
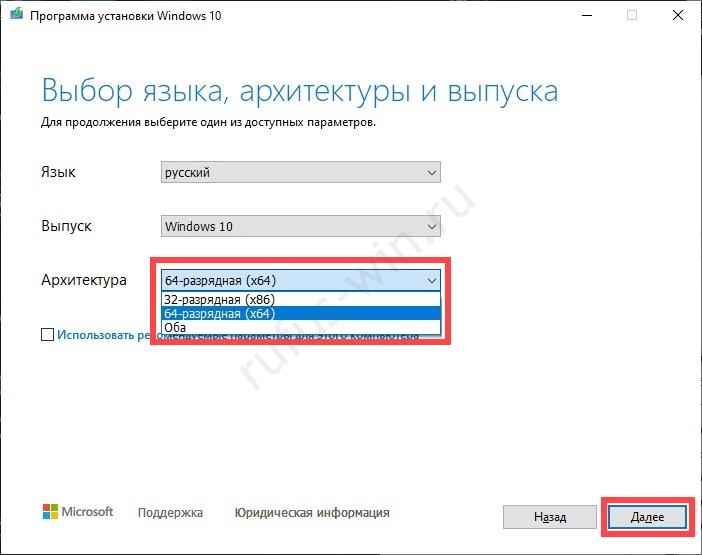
Choosing an action. - Specify the CPU’s bitness or choose “Both” if you plan to install Windows on devices with different CPU architectures.
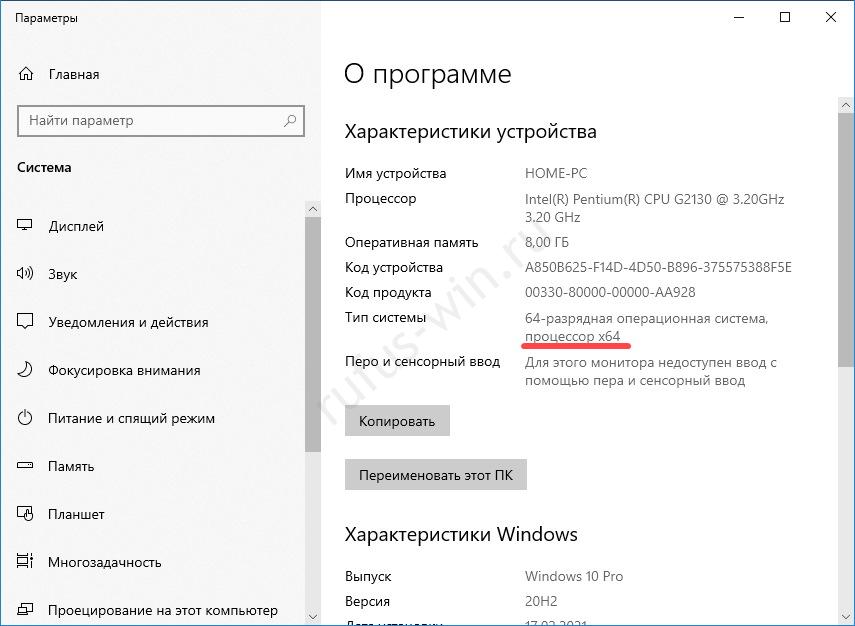
Choosing 64/32-bit Windows 10. - You can find out the processor architecture in the properties of the “This PC” folder.
Determining the system type. - Choose the “ISO file” option.
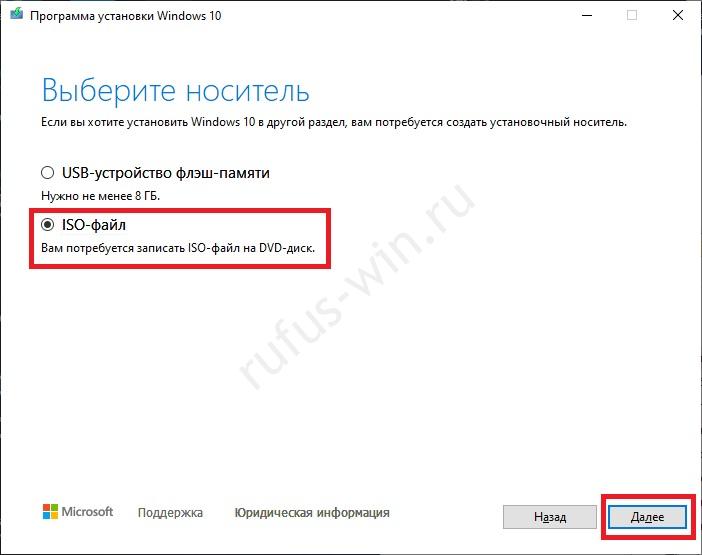
Choosing the media. - Decide on a folder to download to.
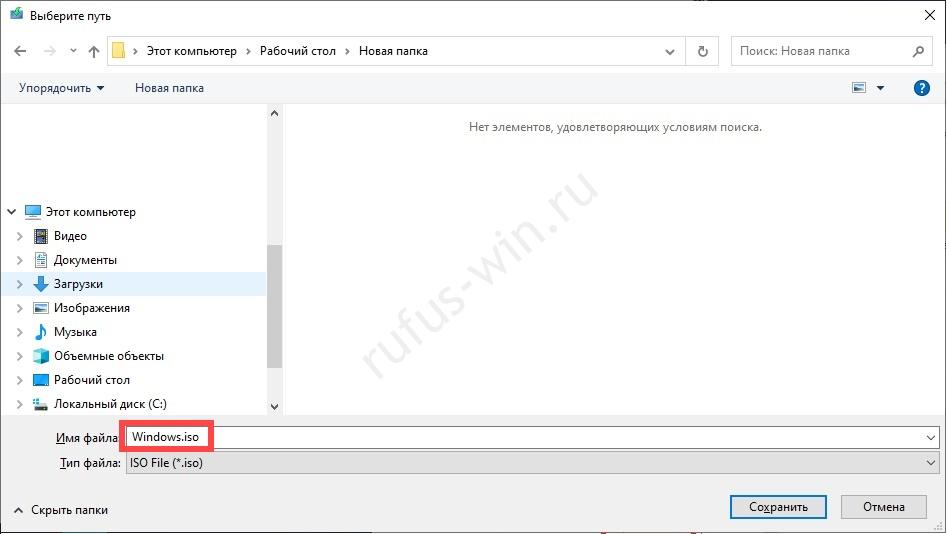
Choosing the download location. - Wait for the image download to finish.
Writing the Windows 10 image to a bootable USB drive
Once Rufus and the image have downloaded to your PC, launch the program:
Prepare a USB drive with more capacity than the downloaded ISO file takes up. Make a copy of the files stored on it — the drive will be formatted and the information will be lost.
- In the first drop-down list, select the target device: a USB drive or a portable hard drive.
- In the second list, choose “Disk or ISO image”.
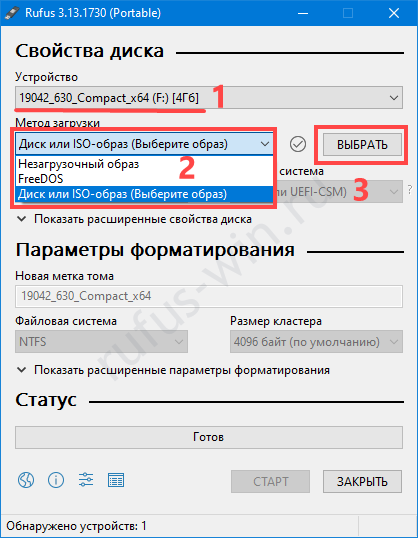
Boot selection. - Click “Select” and enter the path to the distribution.
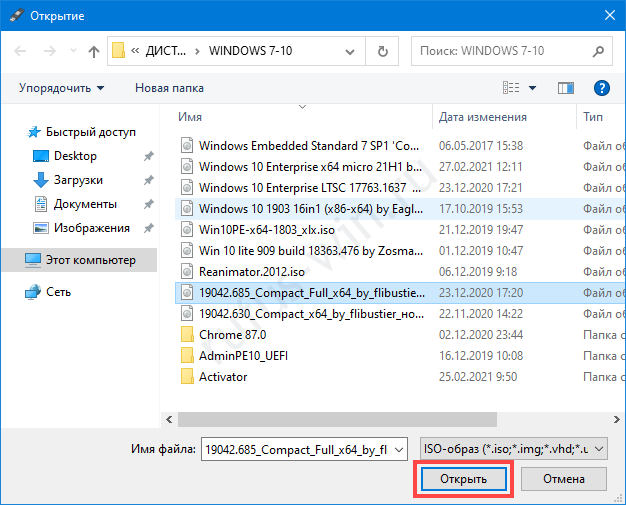
Choosing the Windows 10 image. - Decide on the partition scheme that matches your drive: MBR for BIOS or GPT for UEFI CMS (Legacy).
- The target system is detected automatically.
- In the “Volume label” field, enter a name for the bootable Windows 10 USB drive (it can be edited after writing).
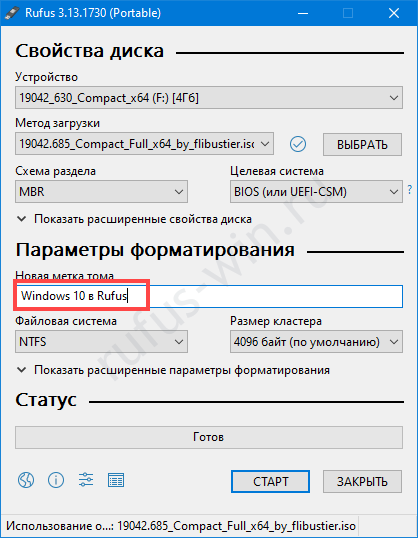
Format options. The “Show advanced…” link hides additional settings: formatting, checking for bad blocks, and creating a drive icon.
- Don’t change the cluster size and file system if they’re available for selection.
- Click “Start” and confirm formatting the media — the files will be deleted and partially overwritten.
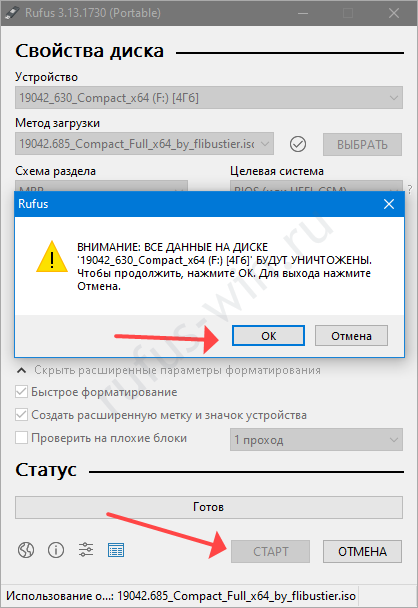
Confirming the format. - Wait for Rufus to finish writing the Windows 10 image to the USB drive.
Preparing the BIOS to boot from a USB drive
To install Windows 10 from the USB drive created in Rufus, tell your computer that the bootloader is located on it.
Disabling Windows Fast Startup
- Press Win + X and open “Power Options”.
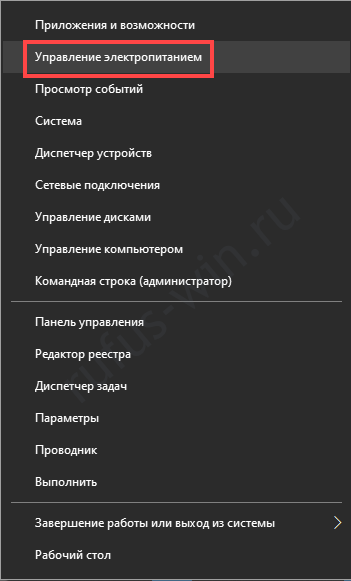
Power Options in Windows 10. - Click “Additional power settings…”.
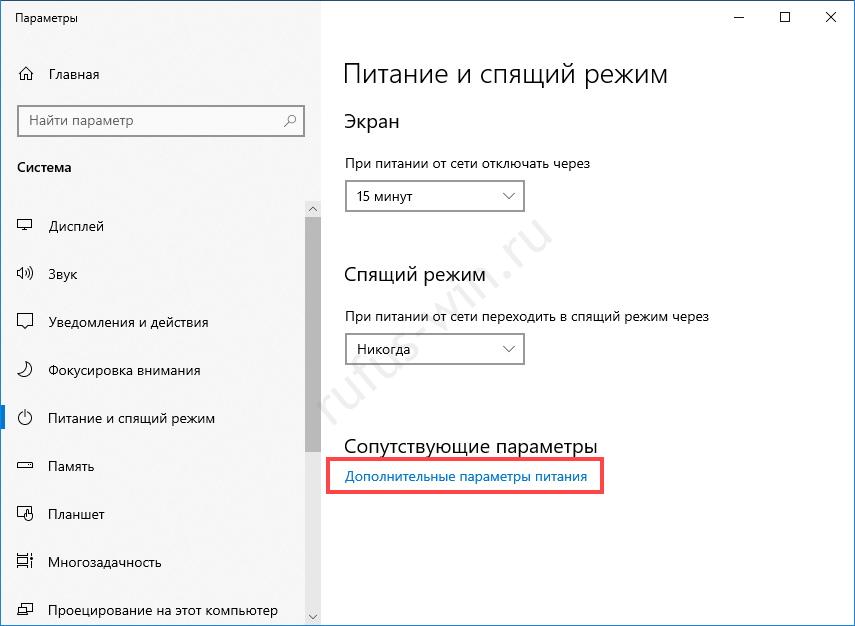
Additional power settings. - “Choose what the power buttons do”.
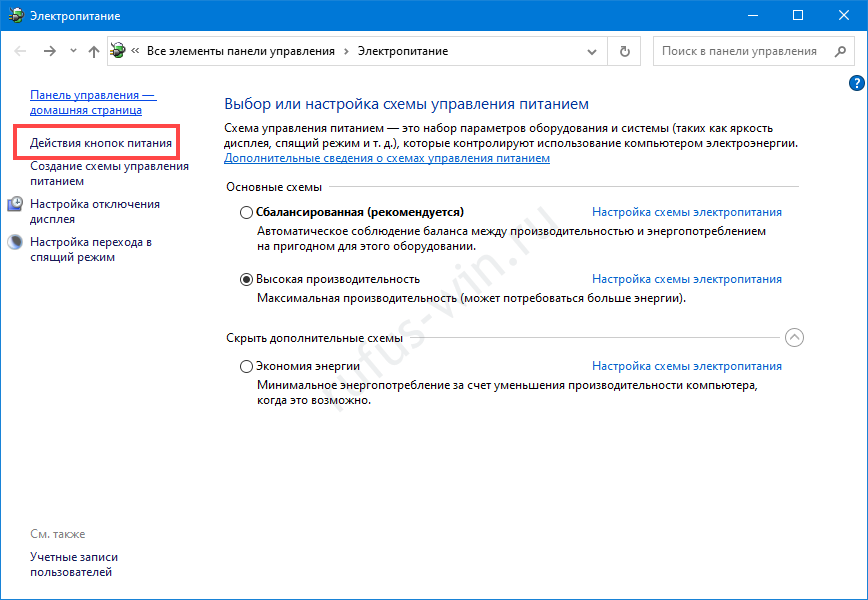
Configuring what the power buttons do. - Enable changing settings that are currently unavailable.
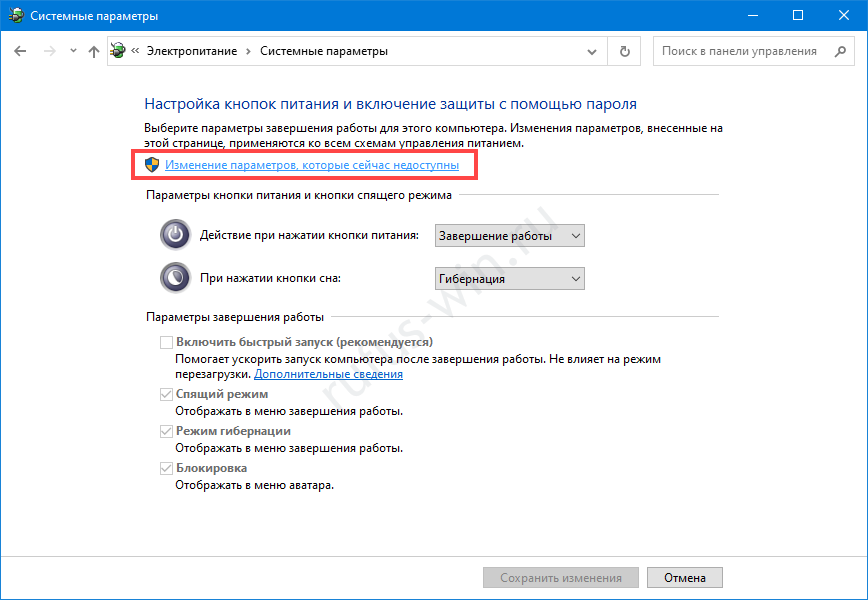
Administrator rights are required. - Clear the checkbox next to the “Turn on fast startup…” option and save the changes.
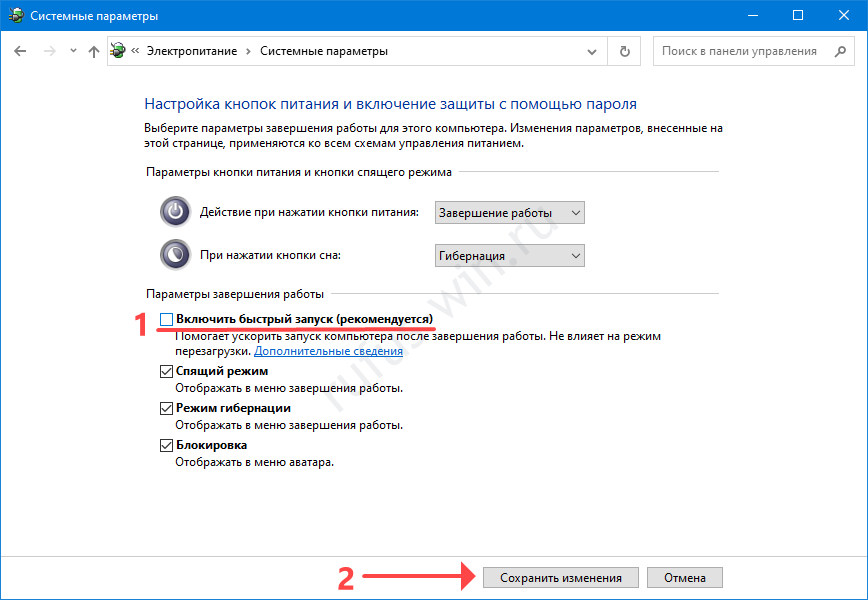
Disabling fast startup. - Restart the computer. After hardware self-testing (the POST procedure) finishes, when the prompt to enter BIOS Setup appears.
- Press the key that opens the Boot menu several times. Most often it’s F11 or F12 (check the manual for your laptop or motherboard). Sometimes the key is shown on the splash screen next to the button for entering the BIOS settings.
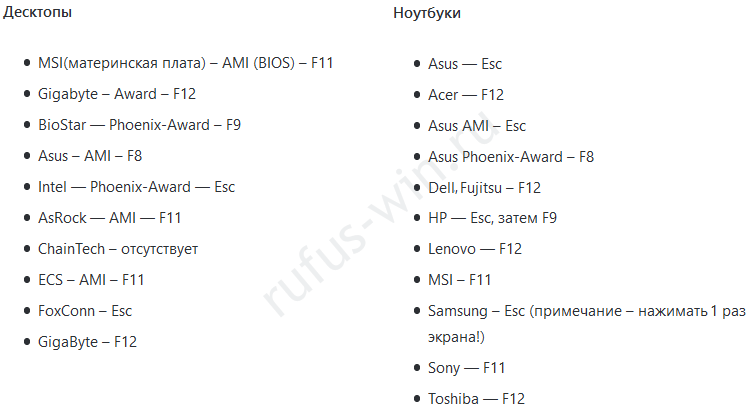
A table of BIOS access keys by manufacturer. - Once the menu appears, select the USB drive as the boot device.
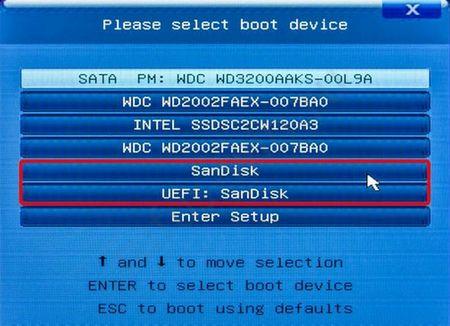
It’s important to specify the correct boot mode: via BIOS or UEFI. - It’s important to specify the correct boot mode: via BIOS or UEFI. A black window will appear (not always) with the message “Press any key…”. Press any key.
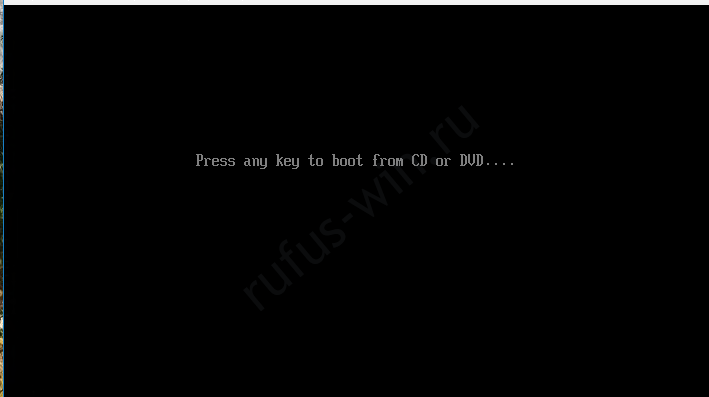
- The Windows installer will start loading.
Installing Windows 10 from a bootable USB drive
To start installing the system, it’s worth following this procedure:
- Specify the interface language, keyboard layout, and time format.
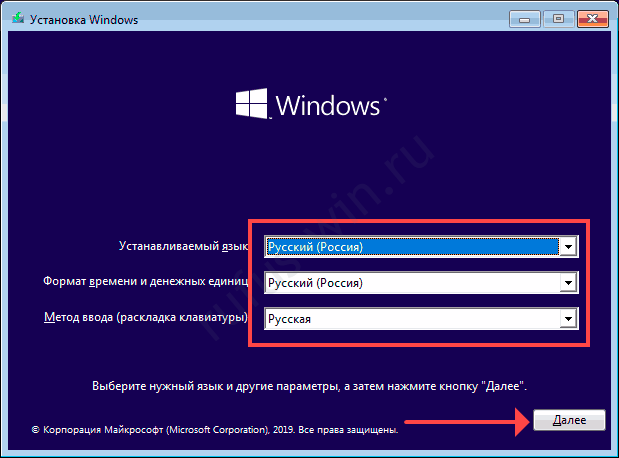
Installation settings. - Click “Install now”. Repair isn’t what we’re after.
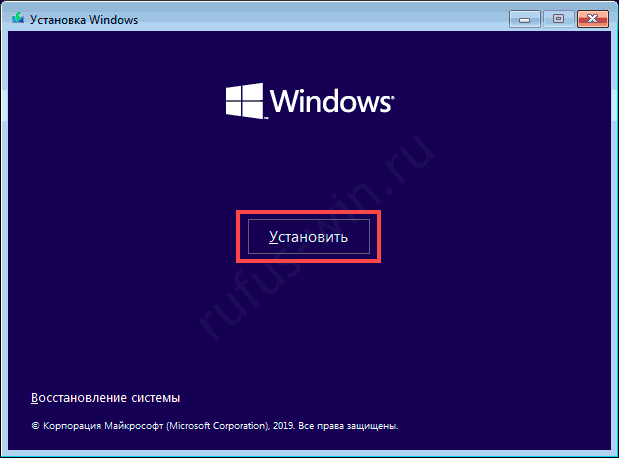
Starting the installation. - Read the Windows 10 terms of use and accept them if you agree with every point.
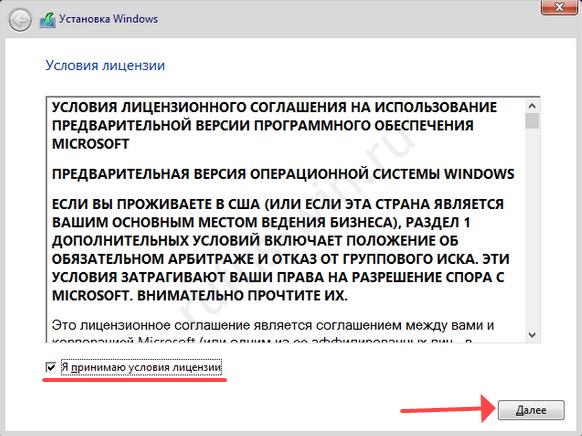
License terms. - Enter a key or skip the step — click “I don’t have a product key”.
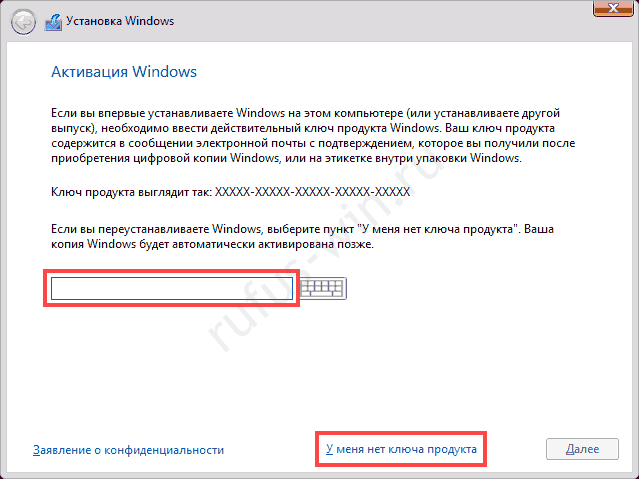
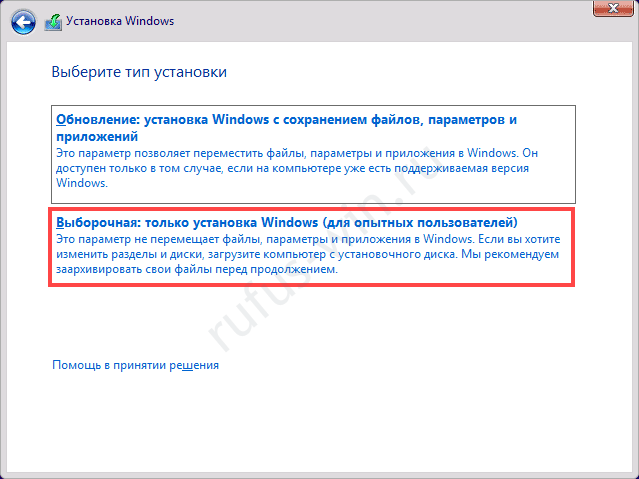
Activating Windows. - Choose Custom installation.
Choosing the installation type. - Select the partition where you’re going to deploy Windows. At this stage, a new drive can be divided into logical partitions: click it and press “New”. Specify the size (at least 40–50 GB) and confirm the action.
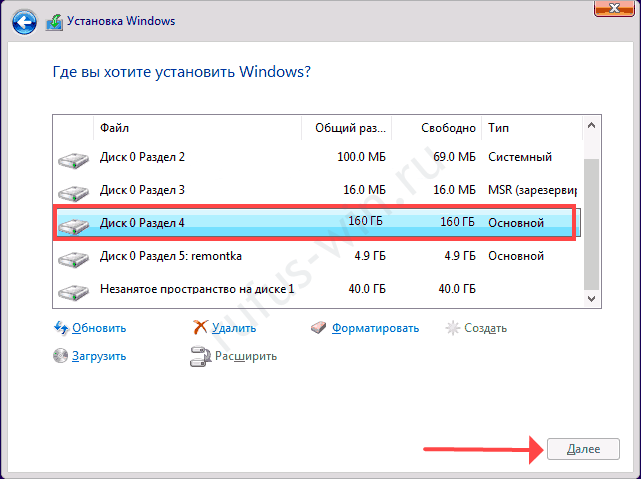
If the HDD or SSD isn’t new, you’ll see one or two volumes about 100 MB in size. Don’t touch them! - The “Format” button will become active. Click it and confirm the operation.
- Wait while the installer copies files from the USB drive and unpacks them.
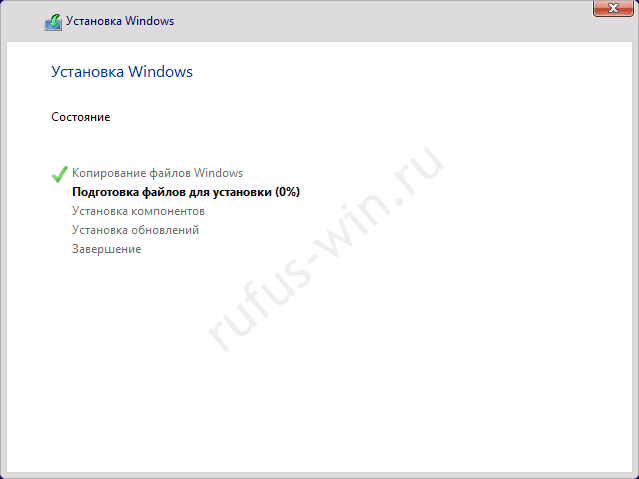
The process takes about 5–10 minutes. - Specify your region and click “Yes”.
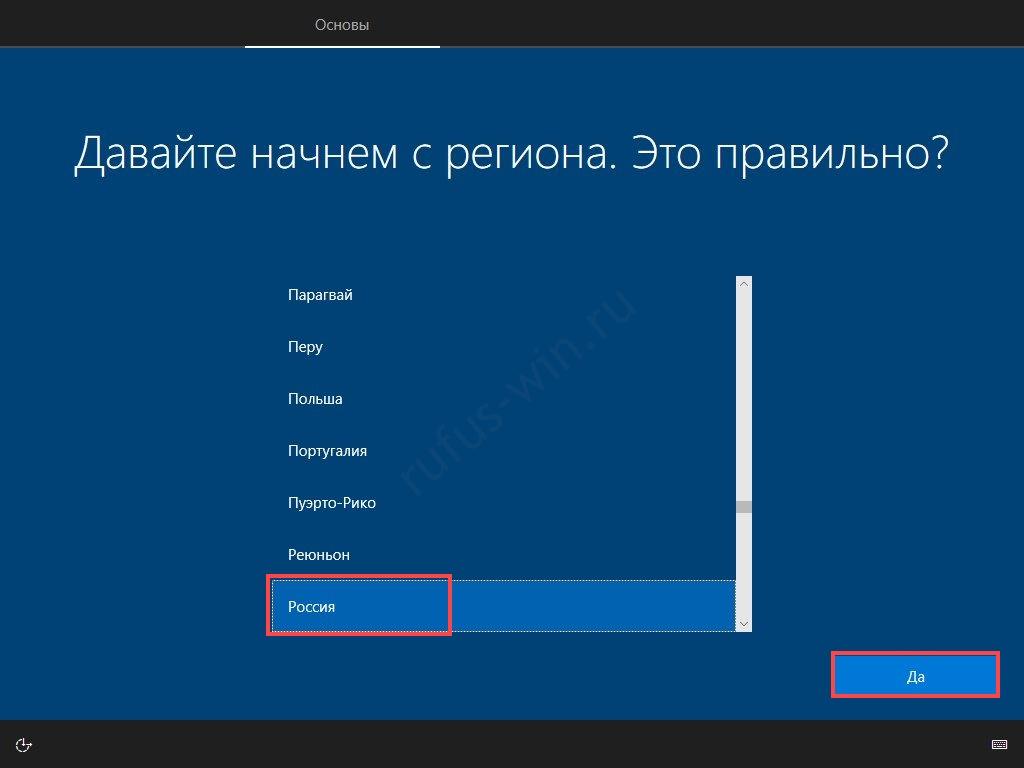
Choose your region. - If English and Russian are enough, skip the step. They can be added after installing Windows 10 from the Rufus bootable USB drive.
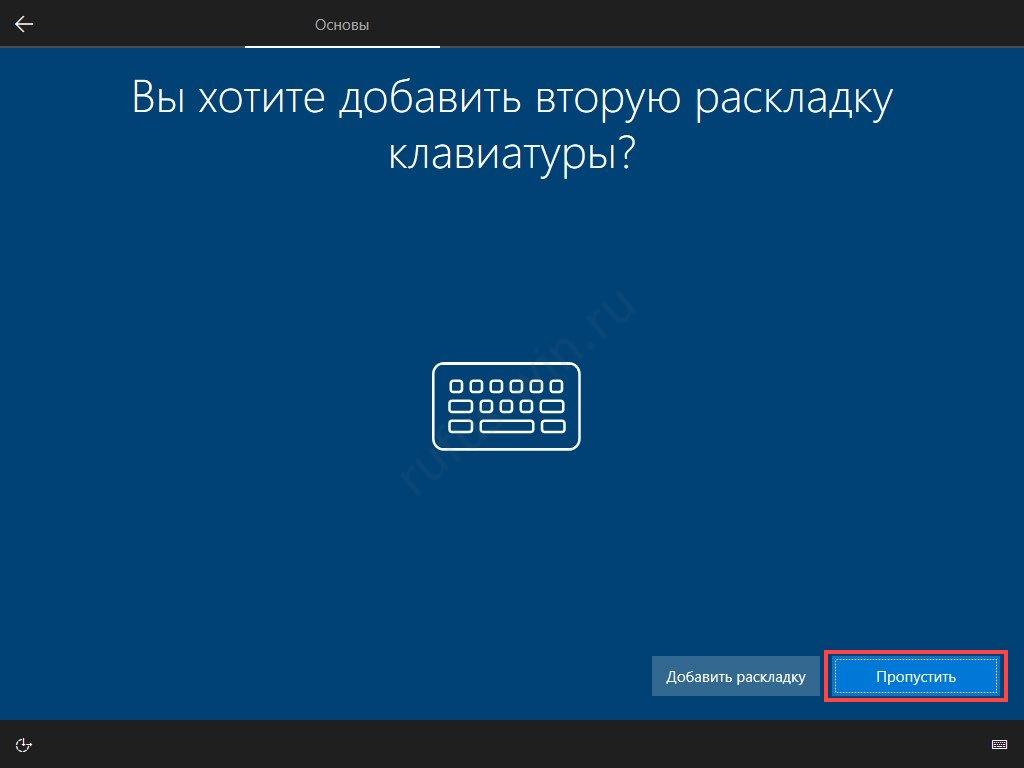
Choosing a language. - Click “Set up for personal use”.
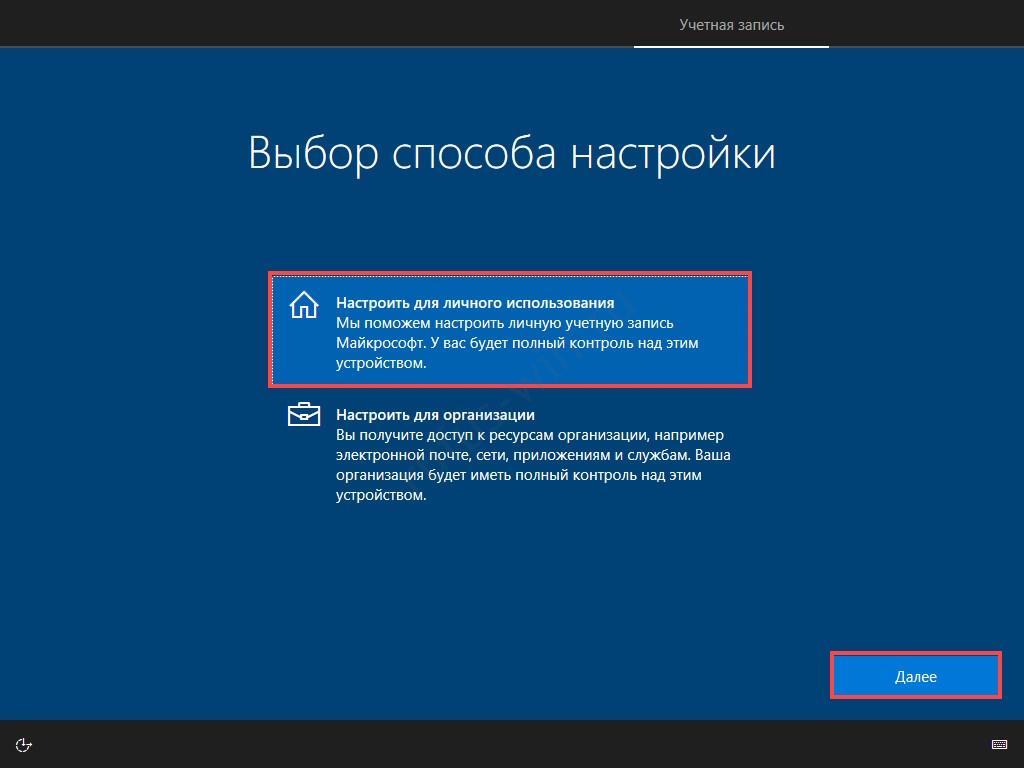
Usage type. - At the bottom, choose “Offline account” or enter your Microsoft account login information (we don’t recommend this).
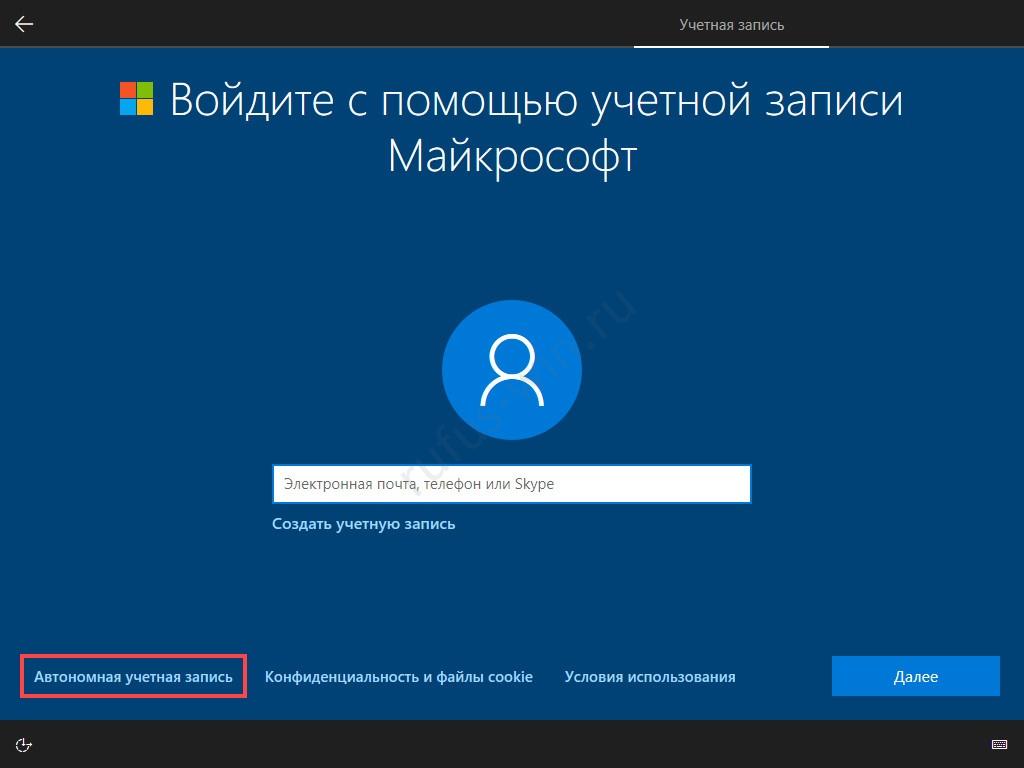
Signing in to an account. - Decline signing in with a Microsoft account a second time.
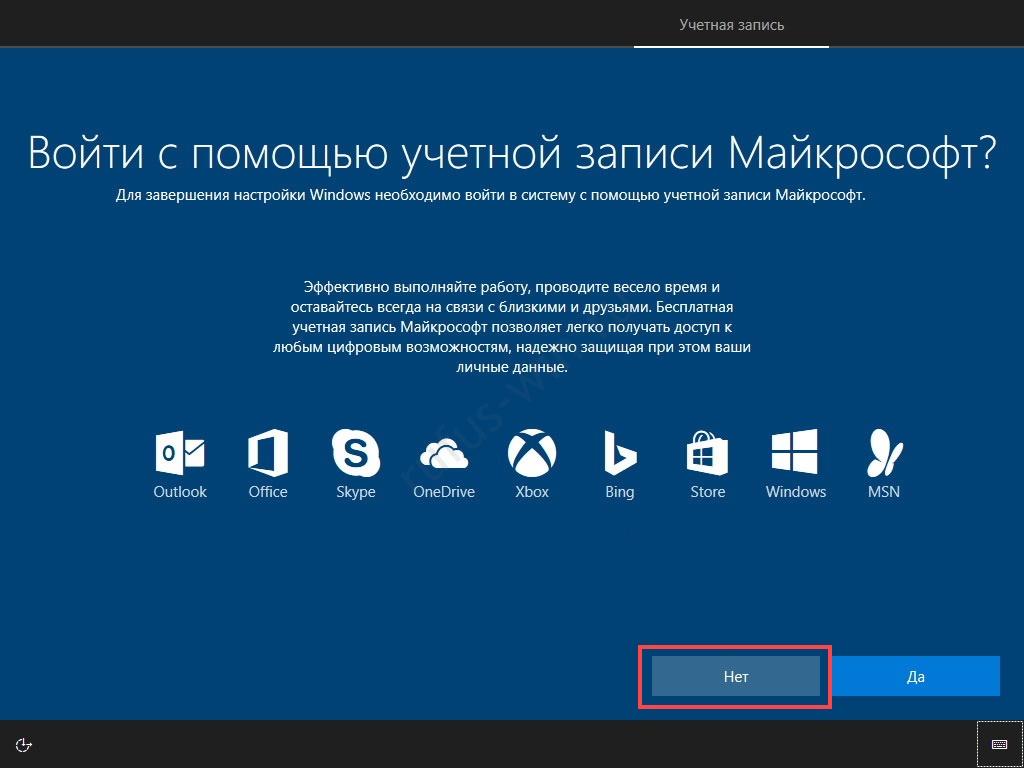
- Set a user name.
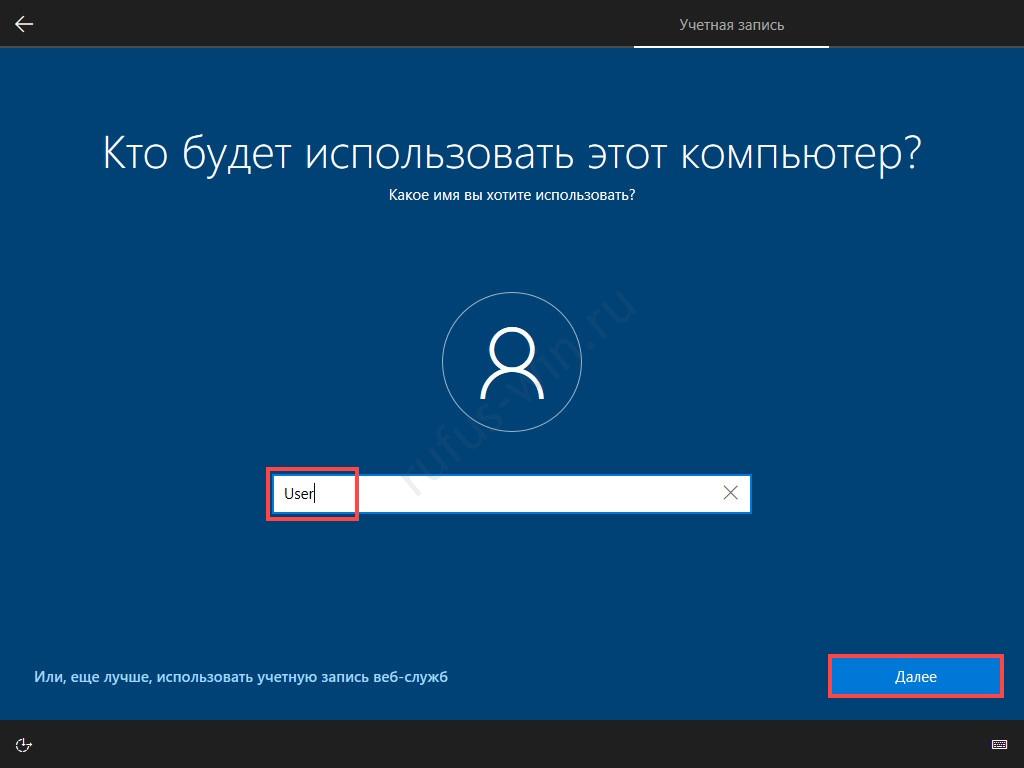
User name. - Create a password. If you don’t need one, click “Next”.
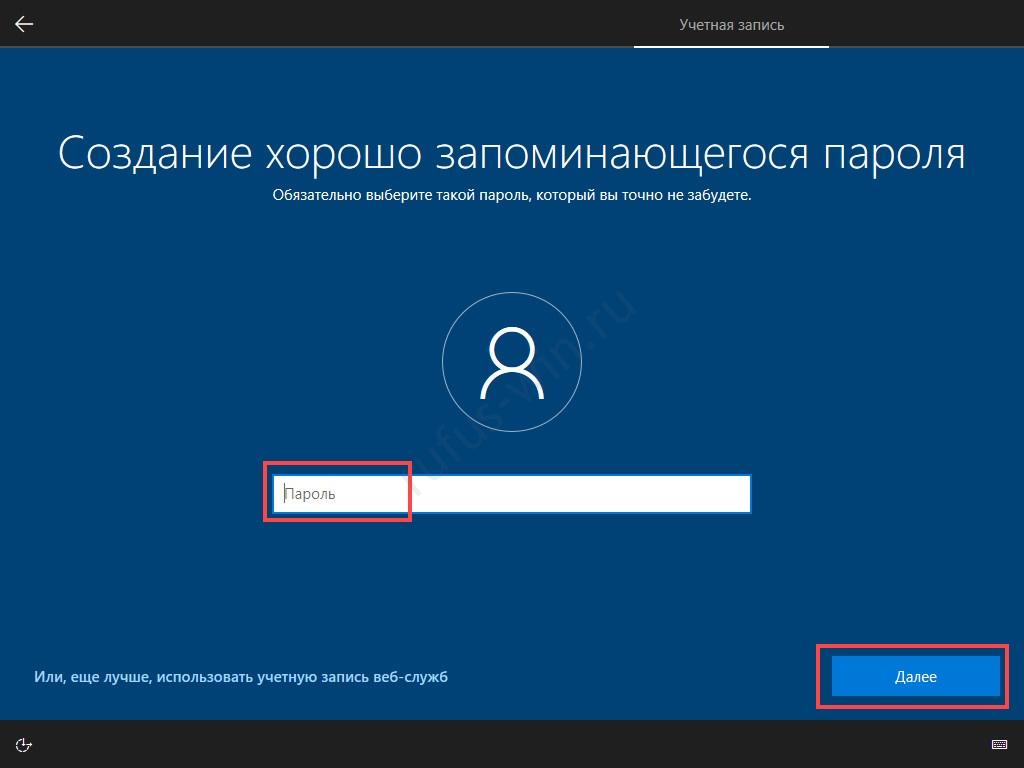
Creating a password. - Turn off the spyware features.
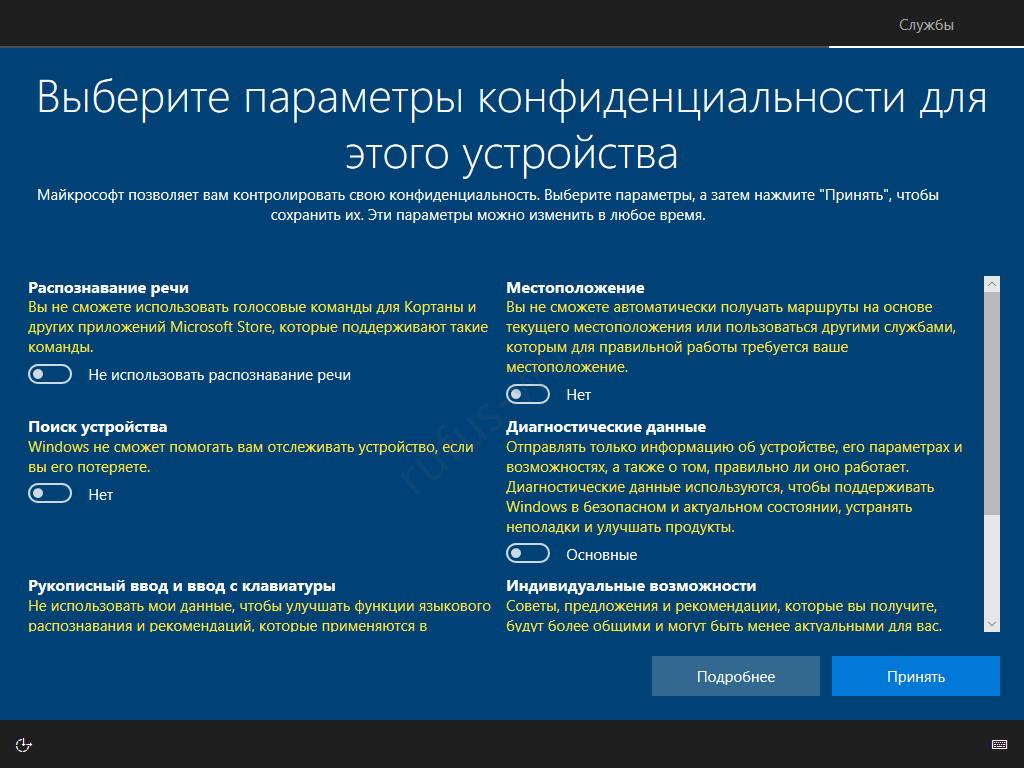
Everything here should be turned off. - A minute or two will pass, needed to finish configuring and preparing Windows for its first launch, and the Desktop will appear.
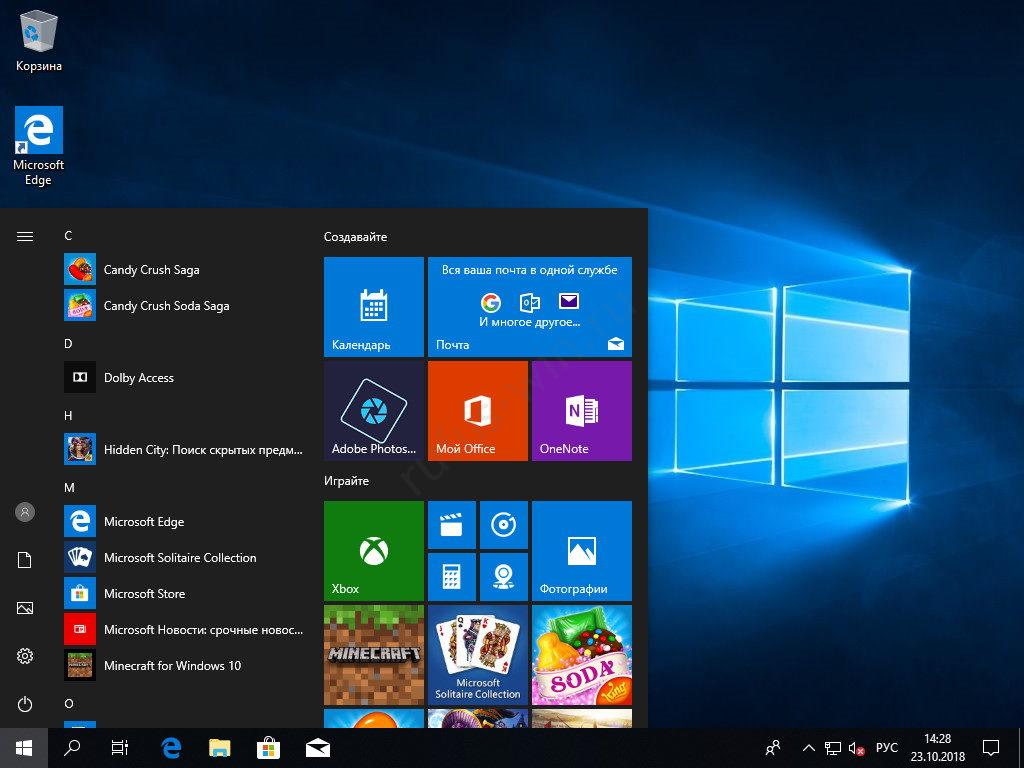
The Windows 10 Desktop.
Questions and answers
If you run into errors or can’t start your PC from the bootable drive, describe the problem in the comments.